Goal: To track your Google Ads conversions (e.g. form fills, purchase, subscriptions, telephone clicks, etc) inside the platform.
Ideal Outcome: You can see how many conversions your Google Ads campaigns generated, as well as the value of those conversions.
Prerequisites or requirements: To follow these instructions, you will need to have installed Google Tag Manager (GTM) on your site.You will also need a Google Ads account.
Why this is important: When you finish this task, you should then be able to see how many conversions and how much revenue each ad is bringing you, allowing you to start optimizing your campaigns for the best results.
Where this is done: In Google Tag Manager and Google Ads.
When this is done: Every time there is a new conversion that needs to be measured.
Who does this: The person responsible for website management, analytics, or paid advertising.
Creating your conversion in the new Google Ads Interface
Log into your Google Ads account at https://ads.google.com
Note: Ensure your account already uses the new Google Ads interface. If your interface looks different from the one shown here, you might be using the classic interface. If that is the case, you should see a button prompting you to try the new interface, you just need to click it.
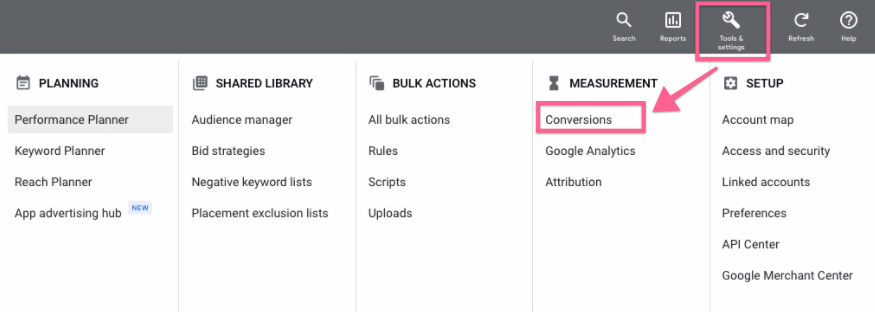
Go to Tools (wrench icon) >> Under ‘Measurements’, click ‘Conversions’:
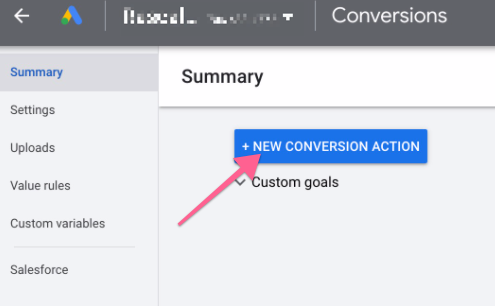
You will be diverted to the ‘Conversions’ panel, click the blue “+ New conversion action” button:
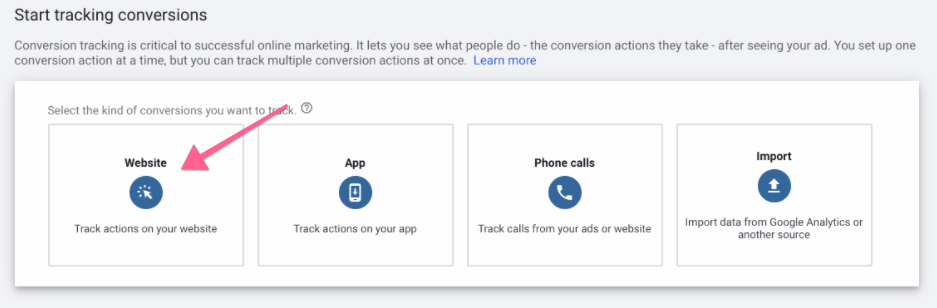
Select the action you want to track:
Website
App
Phone calls
Import
Click the ‘Website’ option.
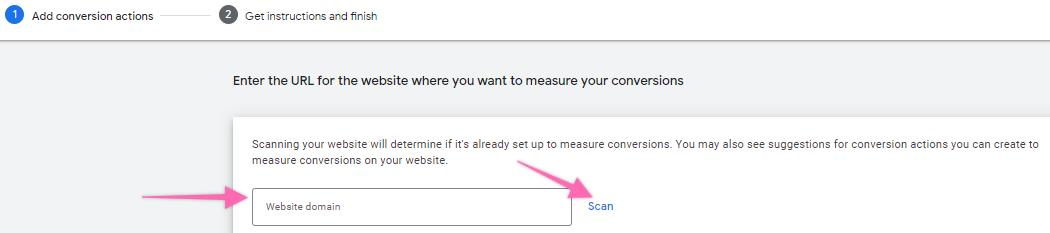
Enter the URL for the website you want to measure your conversions. Click “Scan”.
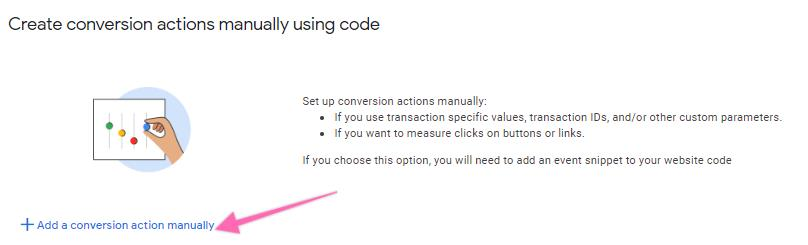
Once successfully scanned, you will have the option to create conversion actions manually using code. Click “+ Add a conversion action manually”.
Inside the ‘New Conversion Action’ panel, you will need to select the goal category when creating a conversion action for your website:
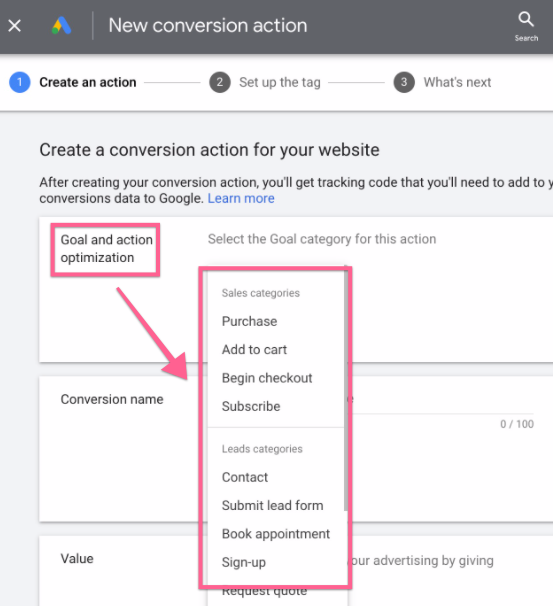
Goal and action optimization: Select the category that best fits your conversion, this will not affect your tracking or the delivery of your ads. Instead, it will allow you to segment your conversions on your reports to analyze similar conversions together. The dropdown option will reveal 3 subcategories:
Sales subcategories – All your purchase conversions are under this category:
Purchase
Add to cart
Begin checkout
Subscribe – like paid memberships, monthly service subscriptions, etc.
Lead subcategories – Any lead conversion tracking including:
Contact
Submit lead form
Sign-up
Book appointment
Request quote
Get directions
Outbound click.
More subcategories – Including:
Page view - Select this category when your conversion is a pageview of a page that is known to be tightly related to one of your key conversions (e.g., viewing the pricing page).
Other - If your conversion does not fit any of the previous categories, or if you prefer to have conversions grouped under this extra category, you can do so.
Note: Feel free to choose your subcategory the way you think better suits your business, e.g.:
If your business requires a “Phone Number” to consider the conversion a lead, then “Friend Referral” could be better for the “Submit lead form” category instead.
If your sign-up process has multiple steps, you can choose to consider an “Initiated Sign Up” conversion to be inside the “Sign Up” category or a “Page view”.
Your internal reports must follow the same structure as your Google Ads account to ensure all departments speak the same language.
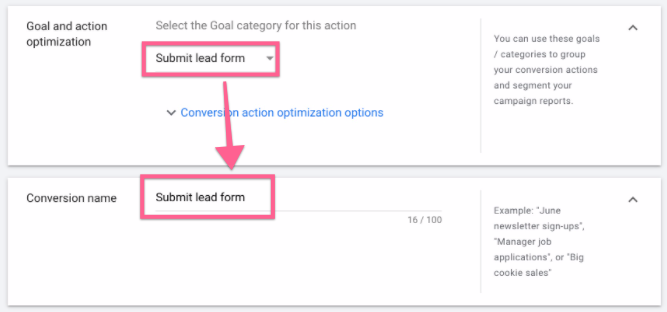
Conversion name: Google will auto-fill the conversion name based on what you’ve selected in “Goal and action optimization”. You’re allowed to edit the name as you see it as long as it’s short and intuitive; it should be obvious to you or anyone what it is about since this name will appear on your reports.
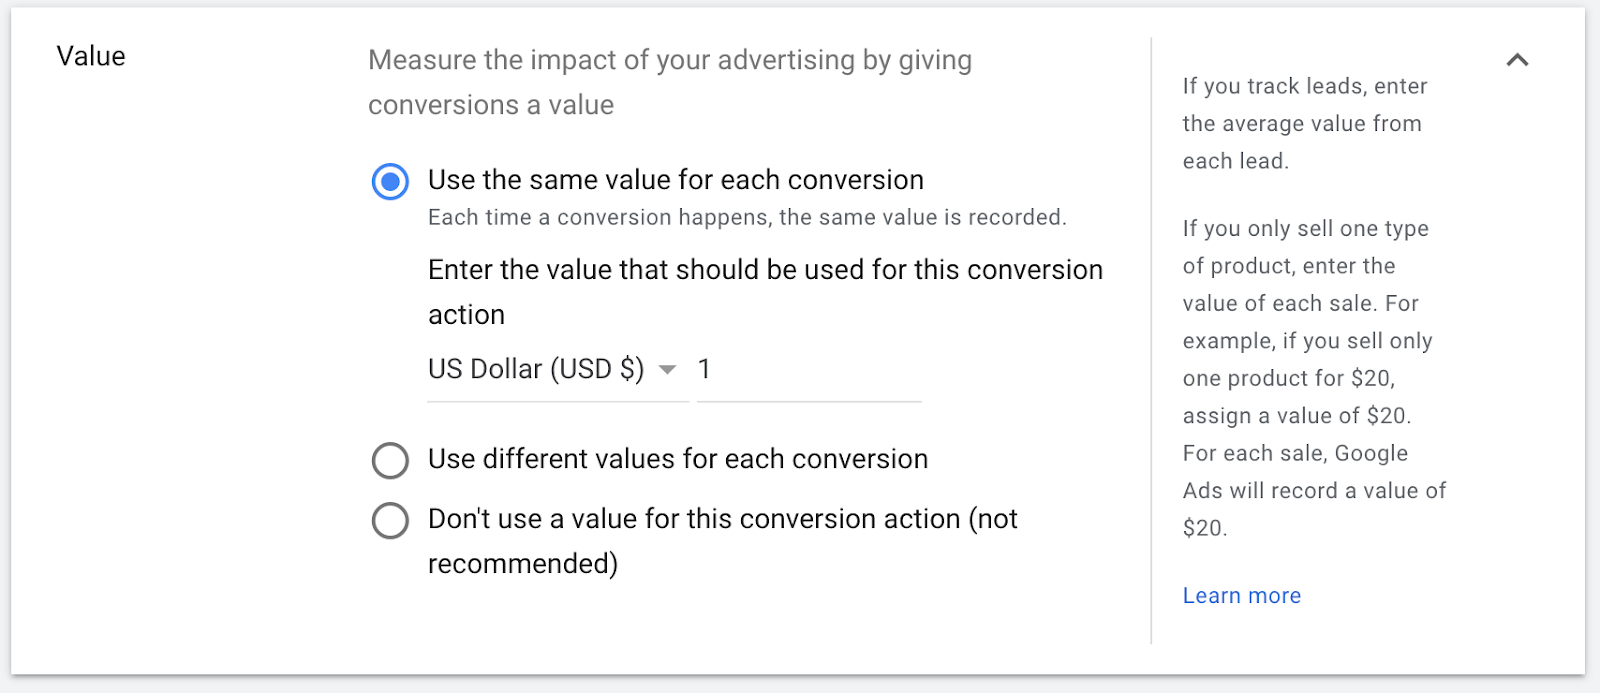
Value: This field is optional but recommended. If you can estimate how much this conversion is worth, you should enter it here.
Example: If you are not sure how much a conversion is worth to you since it is not a purchase, you can estimate it by:
If your Lead to Customer conversion rate is 15%, and each customer is worth 100$ to you, this means that every lead is worth about 15$. (Conversion Rate x Purchase Value)
If you are running a subscription business, or your funnel includes multiple products/services, the “Purchase Value” should be your Average Customer Lifetime Value.
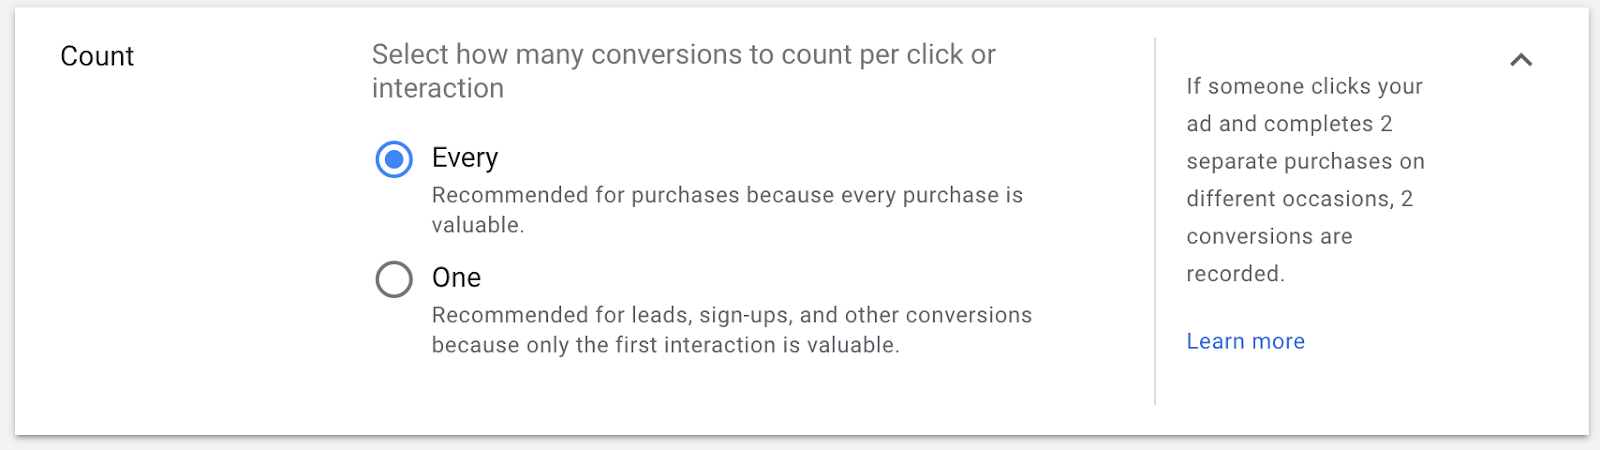
Count:
Every: Select this option if you would like this conversion to be counted every time it happens after an ad interaction. Usually, you will only want to select this option if the conversion adds value to your business, even if performed by the same visitor multiple times. (e.g., a purchase, booking an appointment for different times)
One: Select this option if you want this conversion fired once per ad click. (e.g., If you have 2 contact forms with the same objective on your website and some users for some reason submit both)
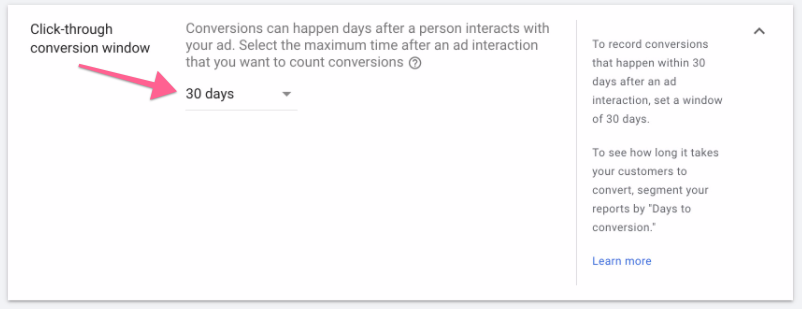
Clickthrough conversion window: Here, you can configure the period of time after a visitor clicks on your ad, during which you can consider a conversion to have been attributed to your Google Ads campaign.
Note: If a conversion happens outside your selected conversion window, it will not be reported in Google Ads.
To best select the conversion window, you should look at your customer behavior and understand how long your buyer’s journey takes.
Examples:
If you’re running a SaaS platform and promoting a 14-day trial, you might want your conversion window to be bigger than 14 days; otherwise, some sales might not be recorded in Google Ads.
If you’re running an abandoned cart remarketing Facebook Ad campaign 10 days after the user has left the website, you might not want these conversions being reported on your Google Ads reports and might want to set the conversion window to 9 days instead.
You might want to set up similar conversion windows across all your ad platforms (e.g., Facebook Ads) to make it easier to compare results.
Engaged-view conversion window: Allows you to Select how long to track conversions after a video engagement. The engagement conversion window is the period of time after a person watches 10 seconds or more of your video ad. For example, if you set your engagement conversion window to 3 days, any conversion that happens more than 3 days after a person watches 10 seconds or more of your video ad won't be counted

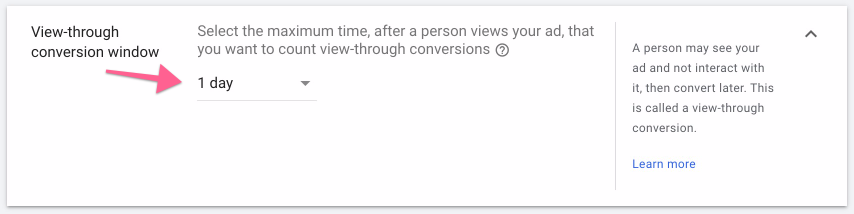
View-through conversion window: Works the same way as the ‘Clickthrough conversion window’ field but applies to view-through conversions (conversions that happened after a visitor viewed but didn’t click an ad for your website).
Usually, you will want to set this window to a lower value than the one you’ve selected for your ‘Clickthrough conversion window’ or else you might end up with a lot of view-through conversions that are not necessarily attributed to the fact that the visitor viewed your ad.
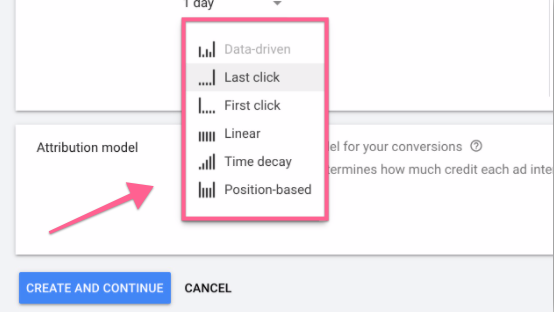
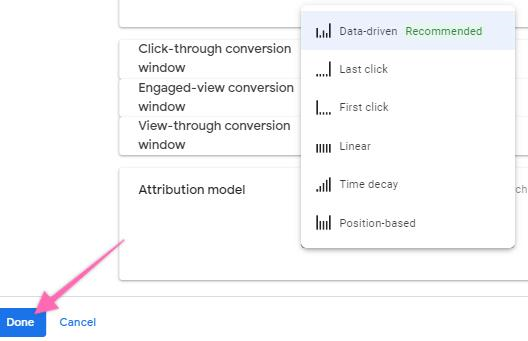
Attribution Model:
Depending on your advertising strategy, a user might interact with multiple ads before actually performing the intended action. Use this option to define how much credit you want to attribute each interaction.
In most cases, you will want to select “Last click” to ensure that all the credit is given to the last ad the user interacted with. Note that this means that if the user has previously interacted with another ad, that ad will not be reporting any conversion even though, in some way, it might have aided the conversion.
To give advertisers some more options, Google Ads offers a few more options to distribute this credit throughout the conversion path:
Data-driven
Last click
First click
Linear
Time decay
Position-based
If you are unsure, select “Last Click”.
Finally, click “Done”.
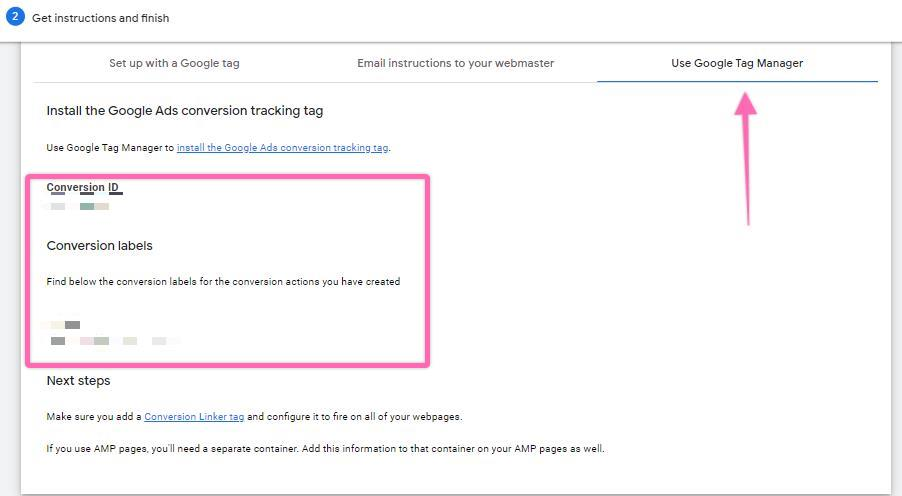
You will then reach the Tag Setup panel, where you are given 3 choices:
Set up with a Google tag
Email instructions to your webmaster
Use Google Tag Manager
For the purpose of this task, we will choose Use Google Tag Manager. Take note of your ‘Conversion ID’ and ‘Conversion label.
Setting up your conversion trigger in Google Tag Manager
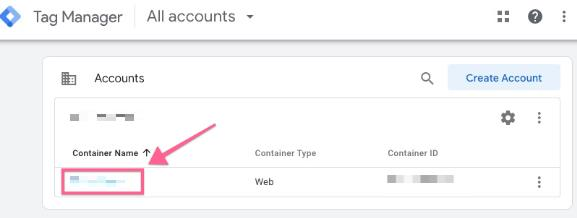
Go to tagmanager.google.com and select the account you want to work on.
You will now need to define what kind of action you want to track. These instructions cover two of the most popular tracking needs:
Page View: If a “Thank You” page follows your conversion, or if your conversion is a view of an important page (e.g., pricing page), you can select this one.
Form Submission: If your conversion is when a user submits a form as a lead or as a subscriber, you can select this one.
Tracking a Page View
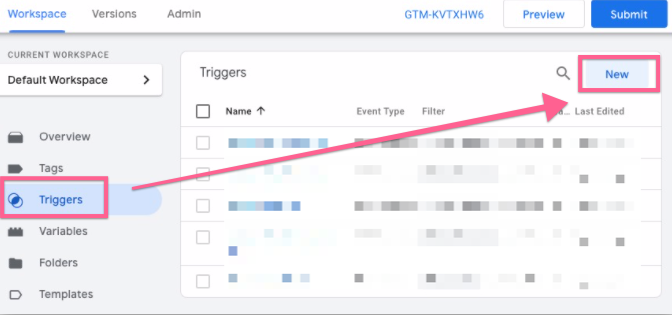
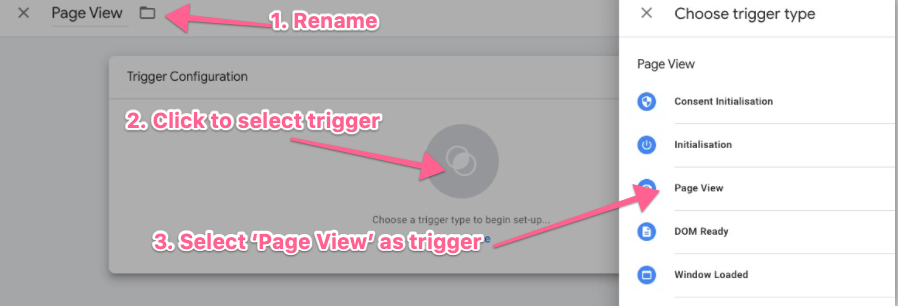
Go to Triggers >> New:
Rename your Trigger >> Click “Choose a trigger to begin setup >> Select “Page View”:
Note: When naming your trigger, it is recommended that you define your naming convention. It should be clear and fast to guess what each trigger is doing based solely on its name. For this task, we will use “Conversion_ThankYou_FriendReferral” since this trigger will be used to track conversion, using a thank you page for referring a friend to get a $20 coupon.
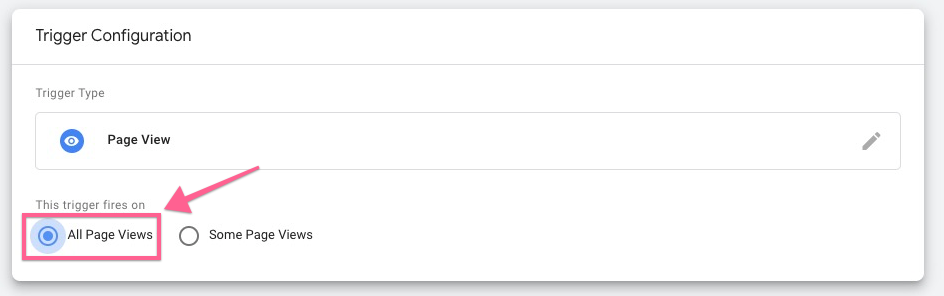
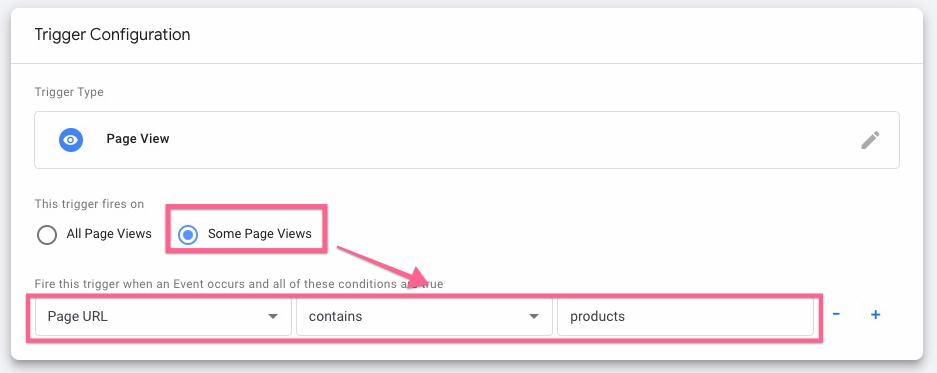
Under the trigger firing rule, select “all pages”. This is recommended for most cases unless you only want to track specific pages, which you then select “some page views” and only fire when the Page URL contains a certain word (e.g., products).
Click the blue “Save” button to save your trigger:
The next steps correspond to setting up a “Click” event. Click here to continue to the next step of the “Page View”.
Tracking a Form Submission
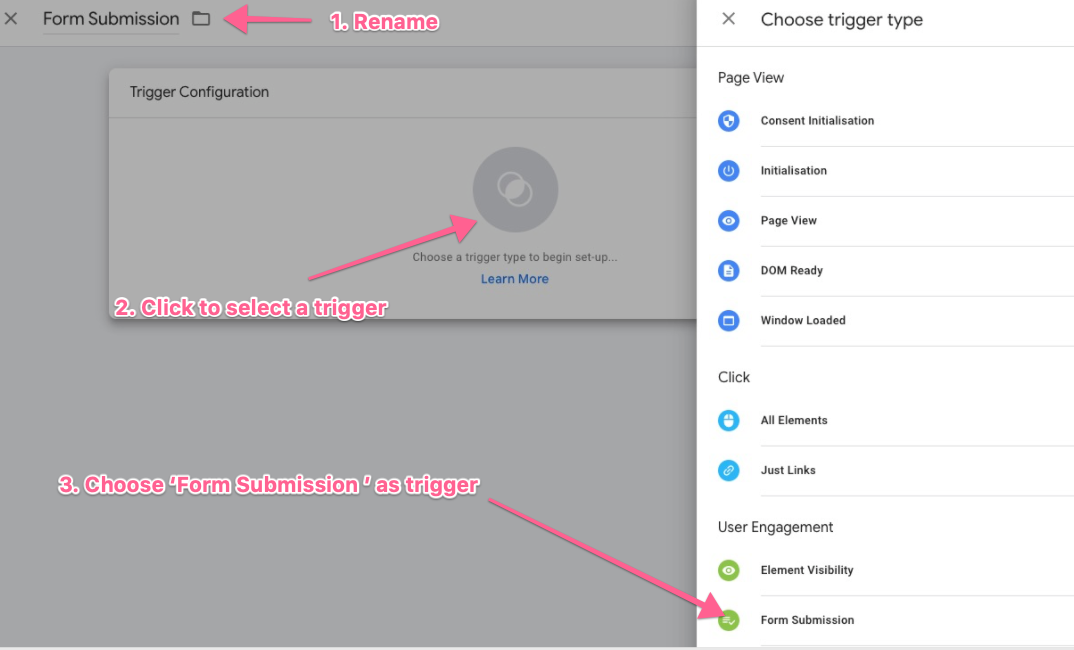
Go to Triggers >> New:

Rename your Trigger >> Click “Choose a trigger to begin setup >> Select “Form Submission”:
After selecting ‘Form Submission’, click on ‘Some Page Views’
Check “Check Validation”. This will ensure this tag will only fire if the form has successfully been submitted.
Under the trigger firing rule, select “Page URL”. This tells Google Tag Manager to fire this tag on a certain page(s). You can then specify which URL to fire this tag. In this example, it is set to fire when the user is on the /sign-up-page.
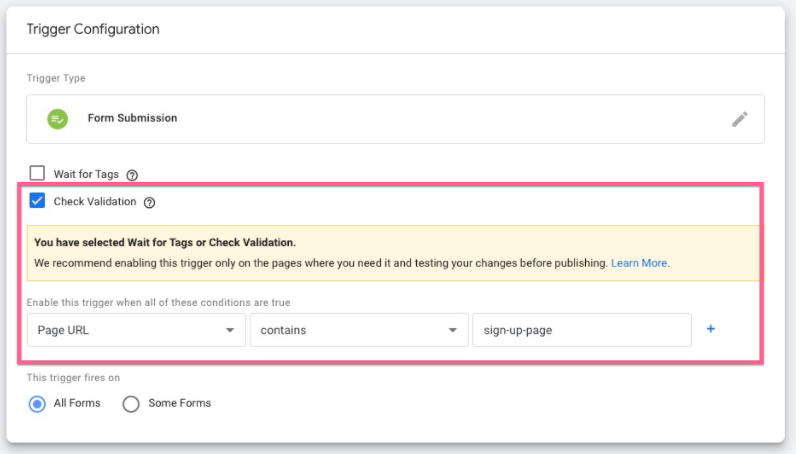
Click the blue “Save” button to save your trigger:
Setting up your conversion tag in Google Tag Manager
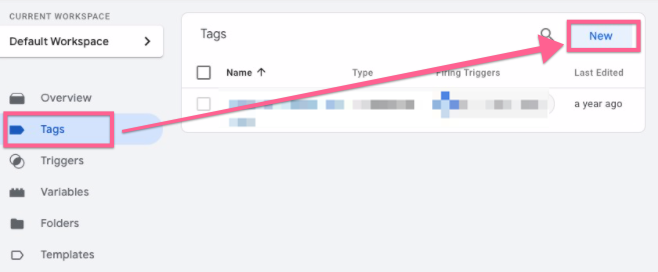
In the sidebar, click on ‘Tags’ and then ‘New’:
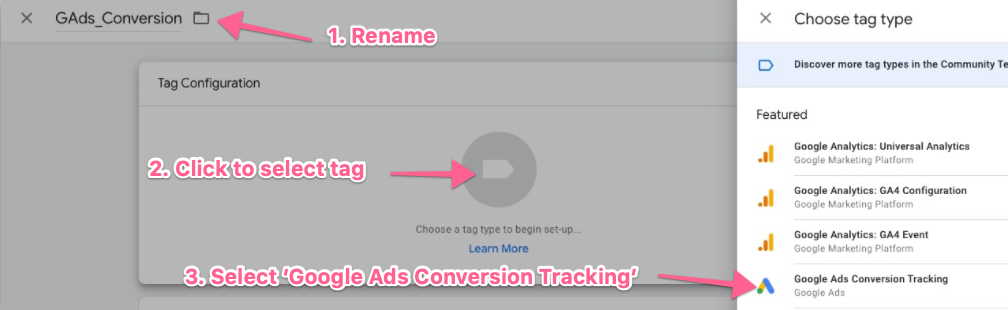
Rename your tag:
Note: When creating new tags, it’s recommended to define a naming convention from the beginning, this keeps your Google Tag Manager set up neatly organized and easy to maintain for many years to come.
[Abbreviated Name Of Tool]_[Use for this tag] is a good start (e.g: “GAds_Conversion”)
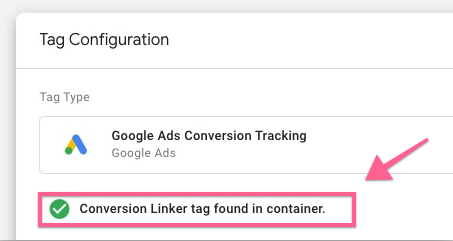
Under ‘Tag Configuration,’ click the tag icon above ‘Choose a tag type to begin setup’. From the dropdown list, select “Google Ads Conversion Tracking”.
You’ll be asked to create a conversion linker tag. If you haven’t created it, click “Create”.

In the conversion linker settings, rename the tag and enable linking on all pages, then click “Save”. The Conversion linker tags are used to help tags measure click data so that conversions are measured effectively.
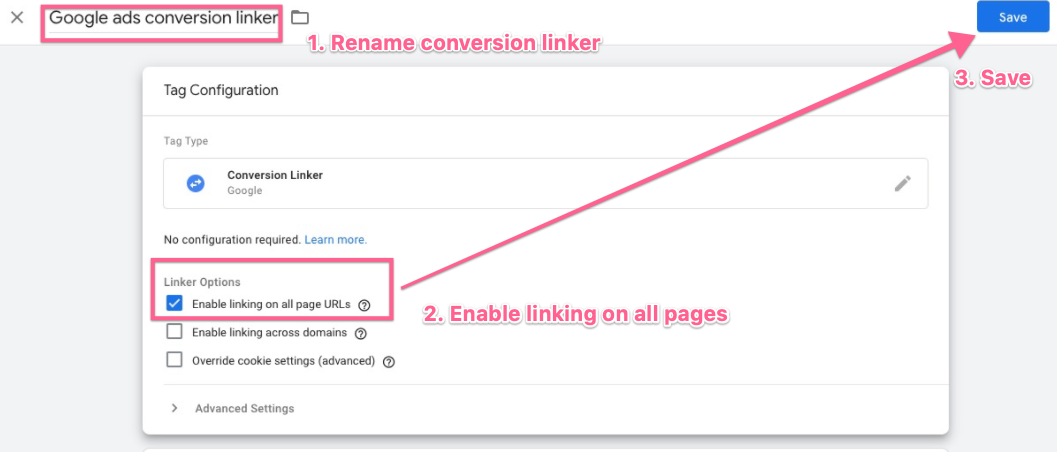
Back in the conversion tag setup page, you should then see the conversion linker tag enabled.
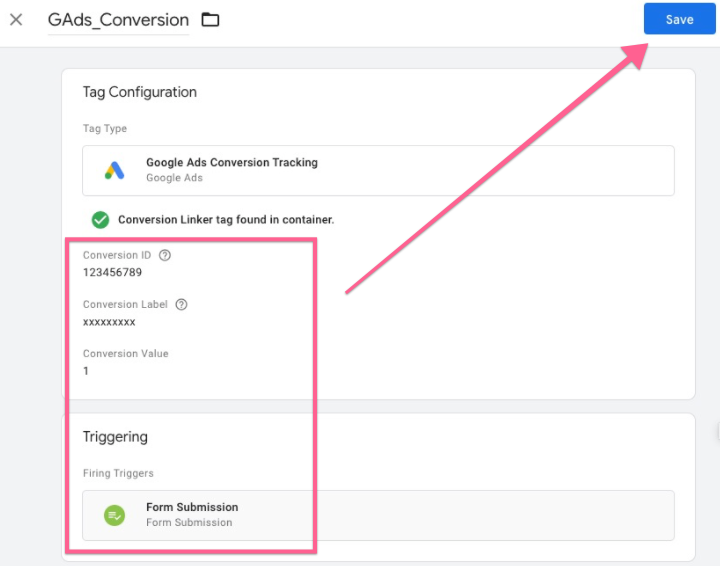
Enter your conversion details:
Conversion ID: Insert the Conversion ID that you got in step 7 of this document
Conversion Label: Insert the Conversion Label that you got in step 7 of this document
Conversion Value: If you choose to have a conversion value, add it here. Do not include the currency symbol.
Order ID: Leave empty unless you can dynamically parse an Order ID value.
Currency Code: Only use this field if you have entered a conversion value. Enter the 3-letter currency code (ISO 4217) you want to use for this conversion.
Note: You can find a list of 3-letter currency codes here.
Scroll down to the ‘Triggering’ section >> Click ‘Choose a trigger to make this trigger fire’ >> Select the trigger you have just created in the earlier steps of this document >> Click “Save.”
If you click “Overview” on the sidebar, Google Tag Manager will display an overview of your changes.
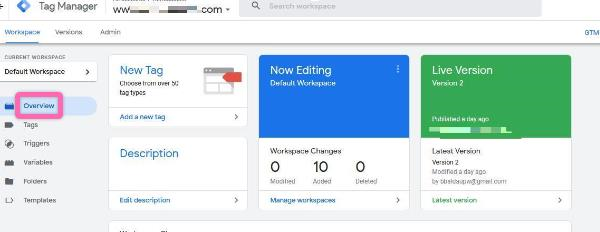
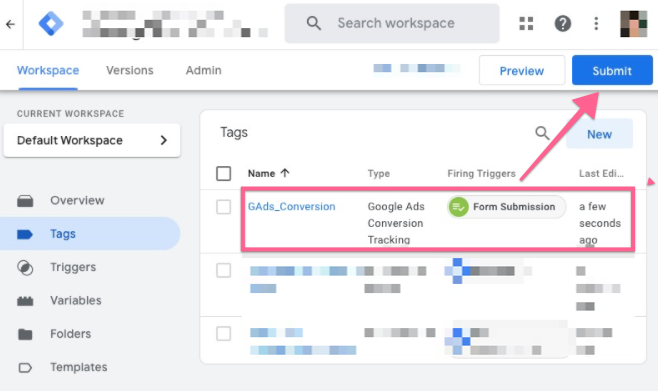
If everything looks ok, you are now ready to hit “Submit”
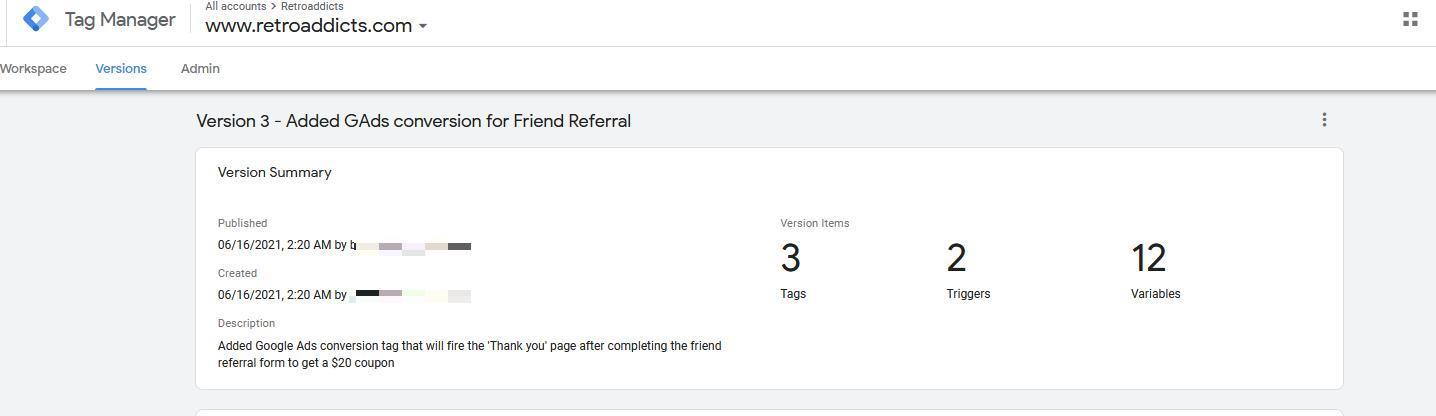
In the Submission Configuration panel, you will be given a chance to add a name and description to this version. After you have done so, hit “Publish”.
Note: Adding a name and description is optional but recommended. You should enter the information here to make it easy to know what changes are being made.
That’s it! You will now be taken to see the summary of the changes you have just made:
Checking if your conversion tag is firing correctly.
Open your website using Google Chrome.
Perform the required action to trigger your conversion.
e.g., Open your “Thank You” page, Submit your form, Click your ‘Add to Cart button,’ etc.
Note: To test button clicks, it is better If on your keyboard you hold down the “Ctrl” (or “Cmd ⌘” key If you’re using a Mac) before clicking on the button that you want to track. This will ensure you will remain on the same page and, therefore, be able to see if the event was triggered.

Click on the Google Tag Assistant Chrome extension icon. You should now see a green “Google Ads Conversion Tracking” tag >> Click that tag.
Now go to tagassistant.google.com to test if you are getting the correct data. Follow the steps below.
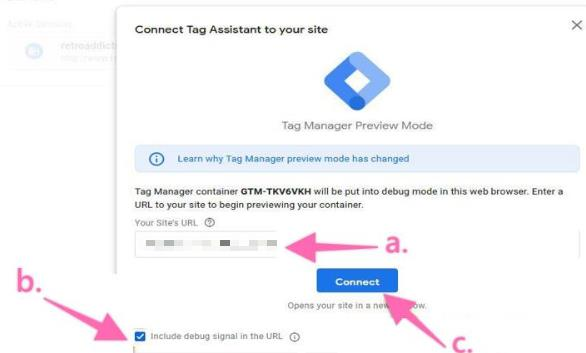
Fill out your domain.
Tick the box below to include a debug signal in the URL.
Click “Connect”.
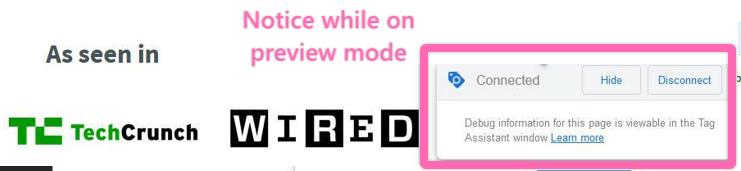
This will prompt you to the ‘Preview Mode’. While on ‘Preview Mode,’ perform the conversion tracking actions we have configured above.
In the list of tags fired, look for the one corresponding to the conversion you’ve set up (in our example, ‘GAds_Conversions_FriendRef‘)
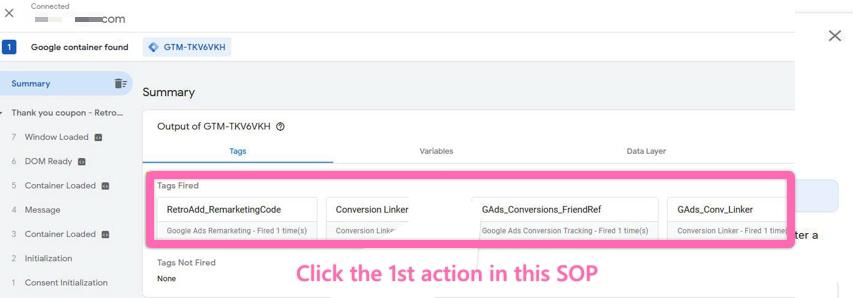
Clicking on the tab, you will see that all settings we configured are the correct Conversion Value, Conversion ID, Conversion Label, Currency Code, and even the trigger:
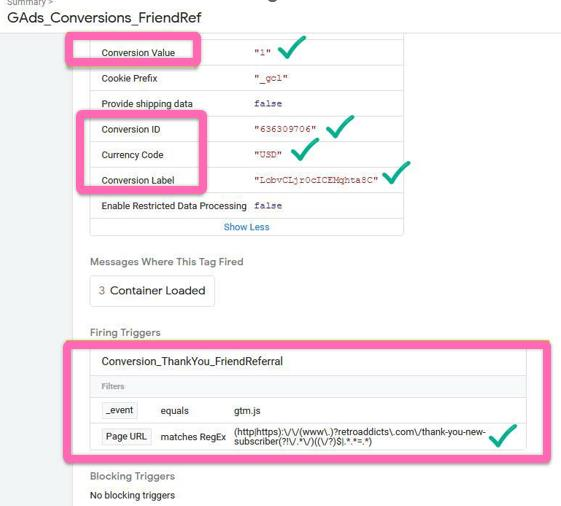
Ensure your conversion is not firing when you don’t want it to be performing an unrelated non-conversion action and checking if the tag has been triggered.
Note: If your conversion is a “Thank You” pageview, head over to another unrelated page, if your conversion is a button click, try clicking some other similar buttons on the page:

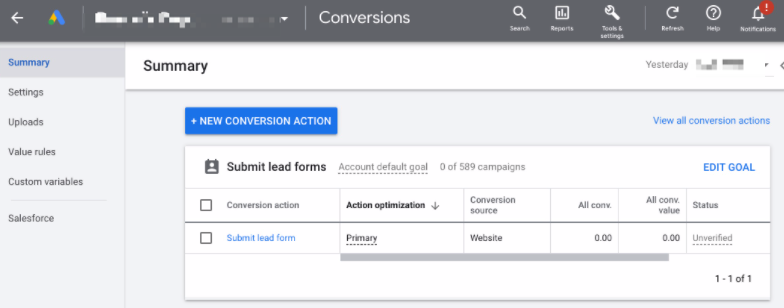
Lastly you will want to check if the data is being correctly sent over to Google Ads. To do so, open your Google Ads Conversions panel by clicking here. And check the “Status” of the conversion you have just set up. Ideally, you should be seeing:
No Recent Conversions;
Recording Conversions;
Note: Sometimes, it may take up to 48 hours to see the status change from “Unverified” to one of those two.
Note 2: If you want to be absolutely sure that your tag is firing correctly, you may want to click your own ad and perform the conversion yourself as a regular visitor would. Bear in mind you will be charged for that click.
That’s it! If you’ve performed all these tests, your Google Ads conversion should be working great, and you should start seeing new conversions as soon as you start your campaigns!