Goal: To correctly implement and test cross-domain tracking in Google Analytics.
Ideal Outcome: You will be able to correctly collect all the traffic data that comes to the domains that are under your control and analyze how users interact across them.
Pre-requisites or requirements:
To follow these instructions, you will need to have installed Google Tag Manager on all your domains.
You will also need to have Google Analytics running on all your domains.
Why this is important: Cross-domain tracking makes it possible to unify what would otherwise be considered as two (or more) separate sessions that occur under two (or more) of your domains.
The specific steps in these instructions apply only to Universal Google Analytics (not Google Analytics 4).
Where this is done: In Google Tag Manager and Google Analytics.
When this is done: When you add a new domain to your business that you want to track under the same Google Analytics property.
Who does this: The person responsible for website management or analytics.
Google Analytics 4
💡 Note: Google has released a new version of Google Analytics in October 2020, this new version can be set as a property alongside standard version “Universal Analytics”.
The “Universal Analytics” properties will likely be supported by Google for years to come.
To make sure you can follow these step-by-step instructions make sure you have selected the Universal Analytics property once your Google Analytics account has been created.
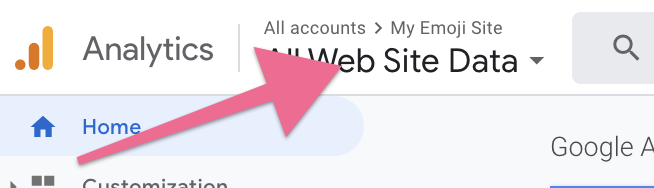
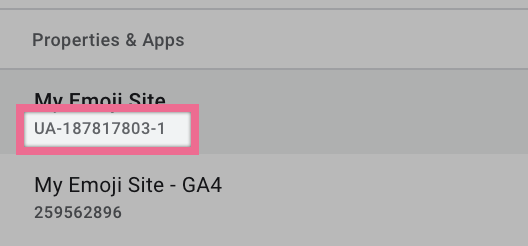
On the top left corner click on the Account Dropdown and select a view within your Universal Analytics property (Not the GA4 property):
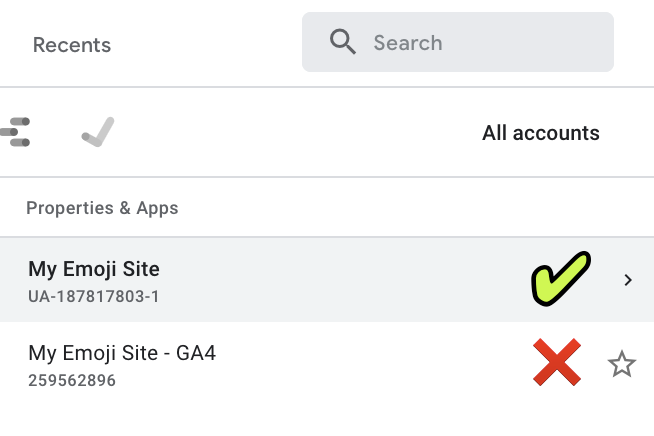
💡 Note: You can identify your Universal Analytics property by noticing the ‘UA-’ prefix in the Property ID below its name:
Setting up Cross-domain tracking
Important:
Some specific cases are outside of the scope of these instructions. If you’re using redirects between your domains if your code is removing parameters from the URLs, or if you are using iframes this might not work for you.
This instructions assume you already have the same Google Analytics property set up in both domains.
Important #2: If you don’t have Google Tag Manager set up on your website, you will want to set that up.
Go to http://tagmanager.google.com and sign in with your account details.
Select the container that is set up on your website.
Note: These instructions assume you’re using the same container in both domains. If that is not the case you will need to perform these steps twice, one time for each of the containers.

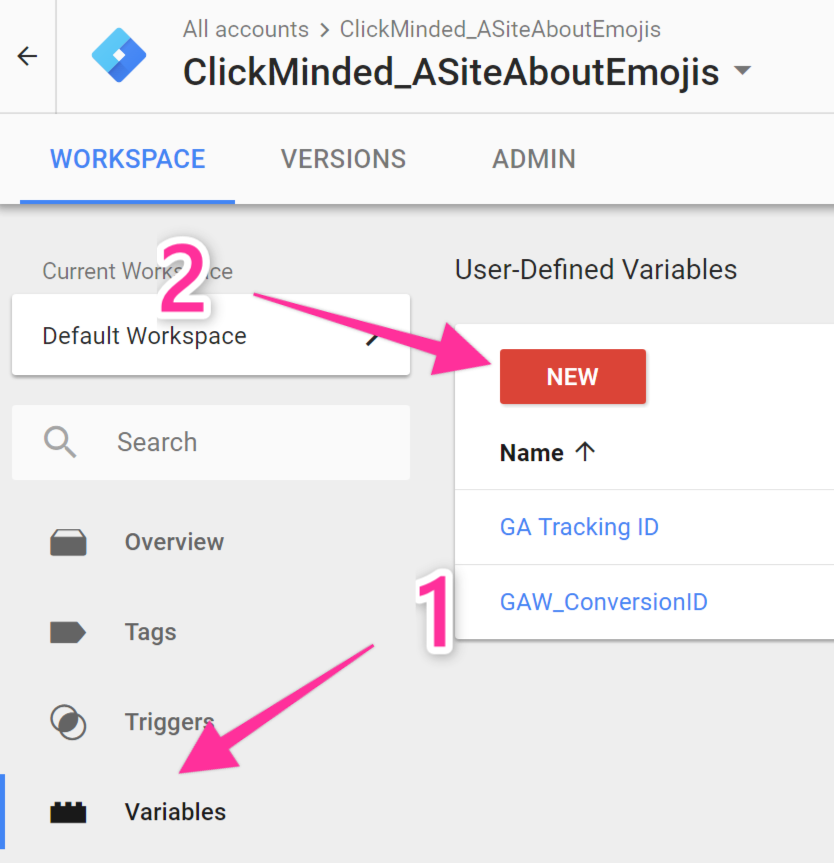
Click “Variables” → “New”
Rename the variable

Click “Choose a variable type to begin set-up…” → “Constant”
Type the domains you will want to link, separated by commas.
Note: If you want to set up cross-domain tracking for all the domains and subdomains you only need to input your main domain. If you only want to implement cross-domain tracking between a few subdomains you should enter your subdomains instead.
Example:
[asiteaboutemojis.com, anothersiteaboutemojis.com] will work for all these cases:
User arrives at asiteaboutemojis.com and clicks a link to anothersiteaboutemojis.com;
User arrives at shop.asiteaboutemojis.com and clicks a link to tools.anothersiteaboutemojis.com;
[shop.asiteaboutemojis.com, course.anothersiteaboutemojis.com] will implement cross-domain tracking for this case:
User arrives at shop.asiteaboutemojis.com and clicks a link to course.anothersiteaboutemojis.com;
But will not work for:
User arrives at asiteaboutemojis.com and clicks a link to anothersiteaboutemojis.com;

Click “Save”:
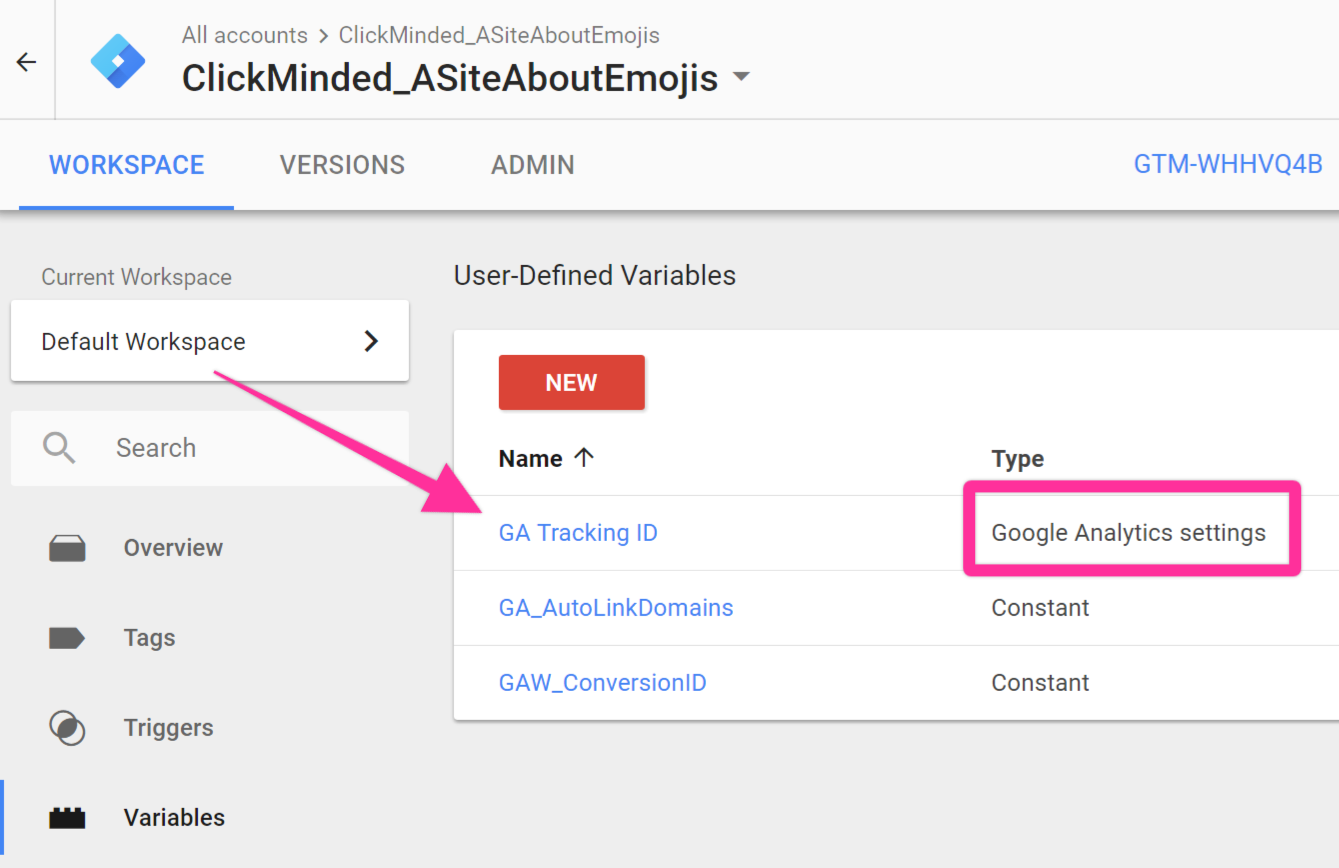
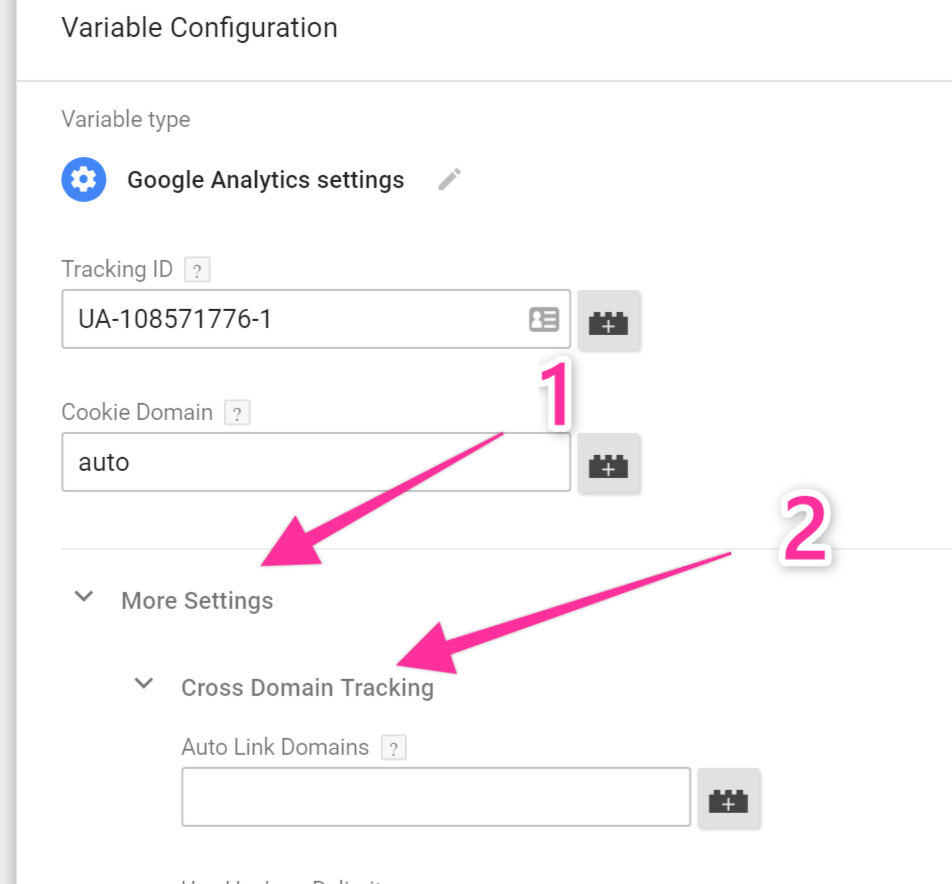
Locate your Google Analytics settings variable, in your list of variables. It should have its type set to “Google Analytics settings”. Click that variable.
Note: If you can’t find this variable your setup might not be using it. If that is the case it is recommended that you start using it.
Click “More Settings” → “Cross Domain Tracking”:
In the field “Auto Link Domains” click the “+” icon and select the variable you’ve just created. In Step 4 of this SOP.
Set the field “Decorate Forms” to “True”.
Still under “More Settings” → click “Fields to Set” → “+ Add Field”:
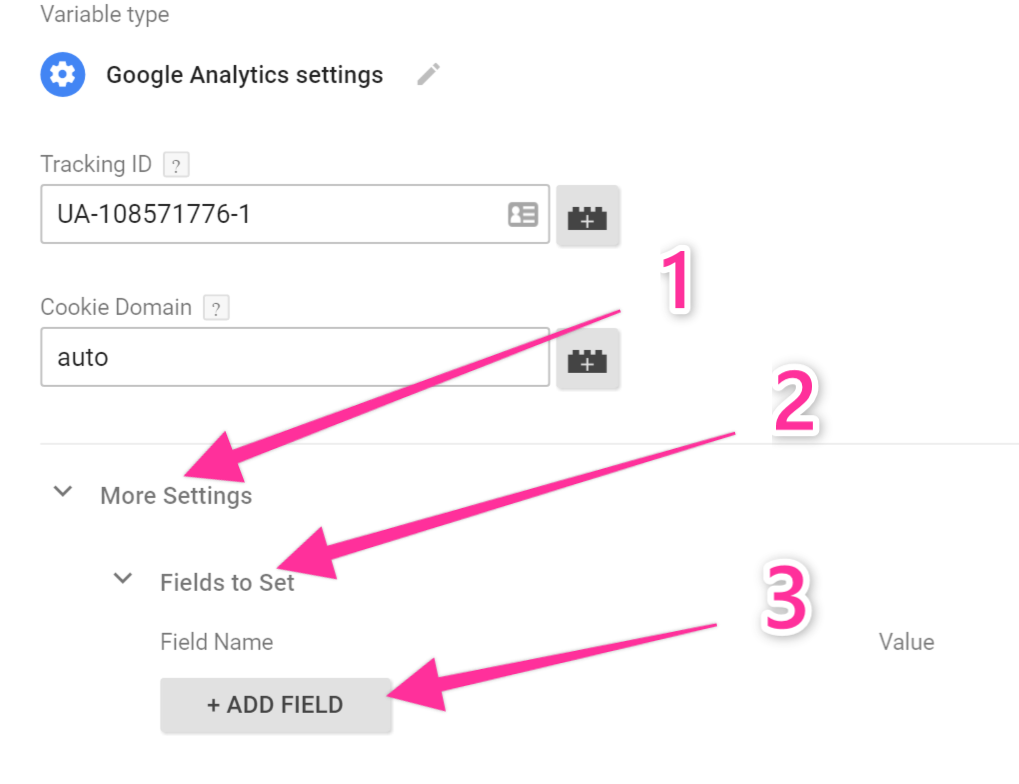
Add these settings:
Field Name: allowLinker
Value: true
Click “Save” on the top right corner:
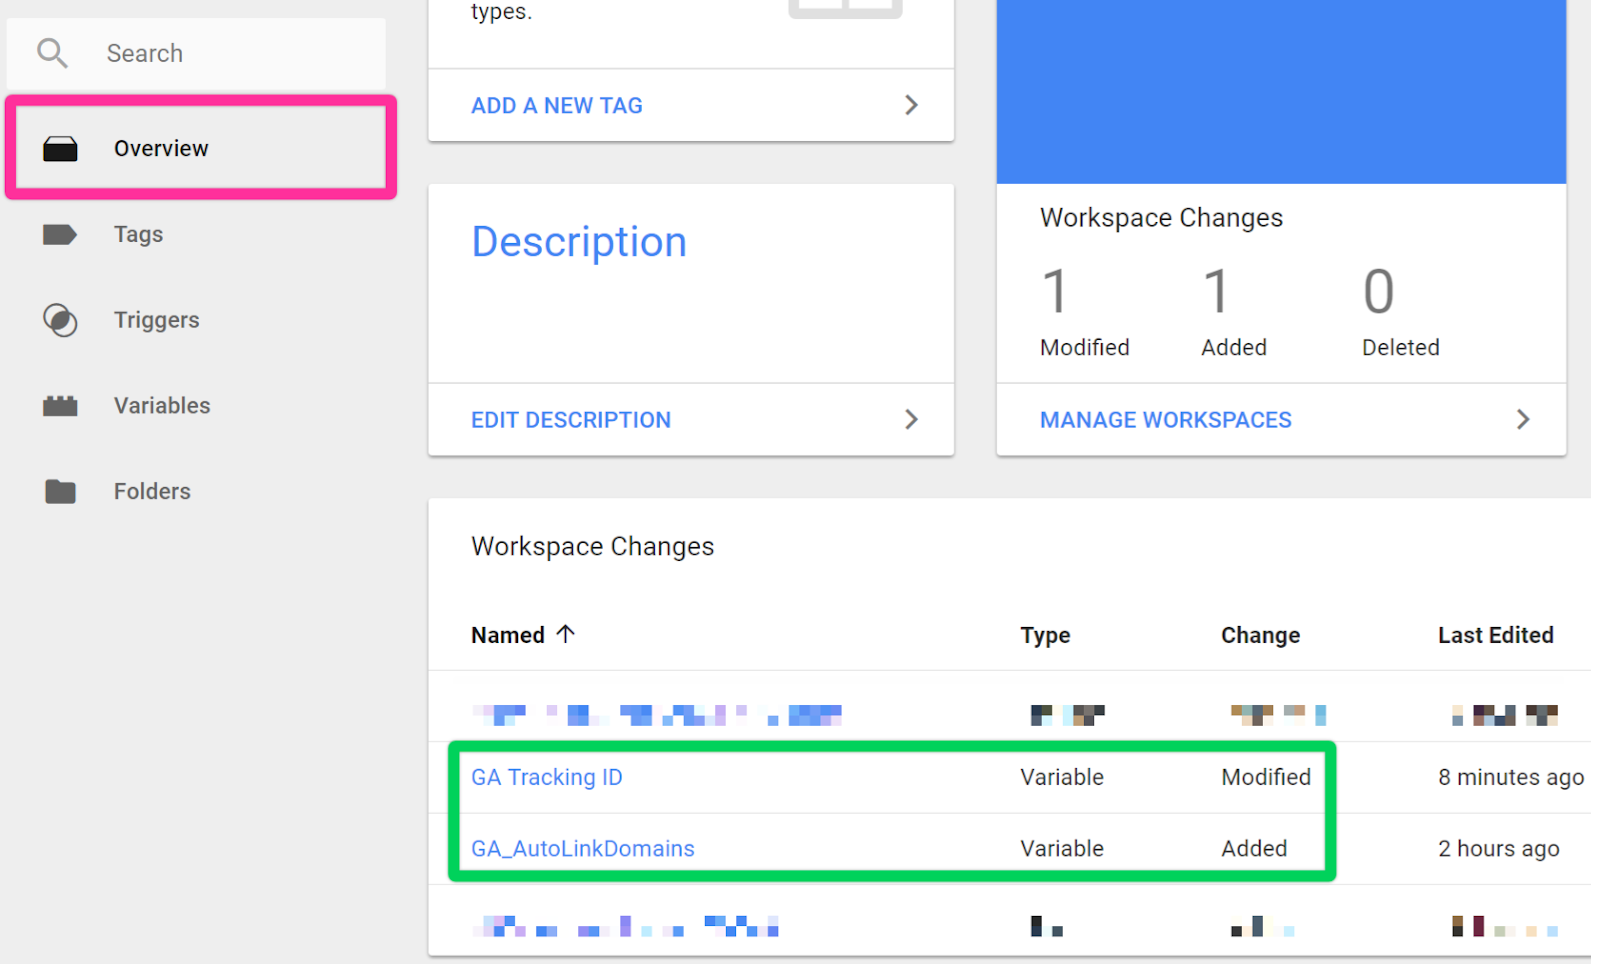
If you now click on “Overview” on the sidebar, this is how your Google Tag Manager overview dashboard should look like:
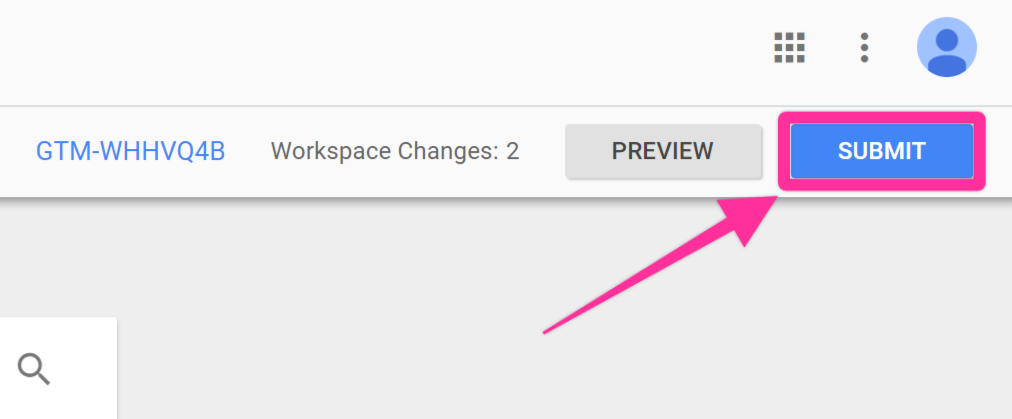
If everything looks ok, you are now ready to hit “Submit”
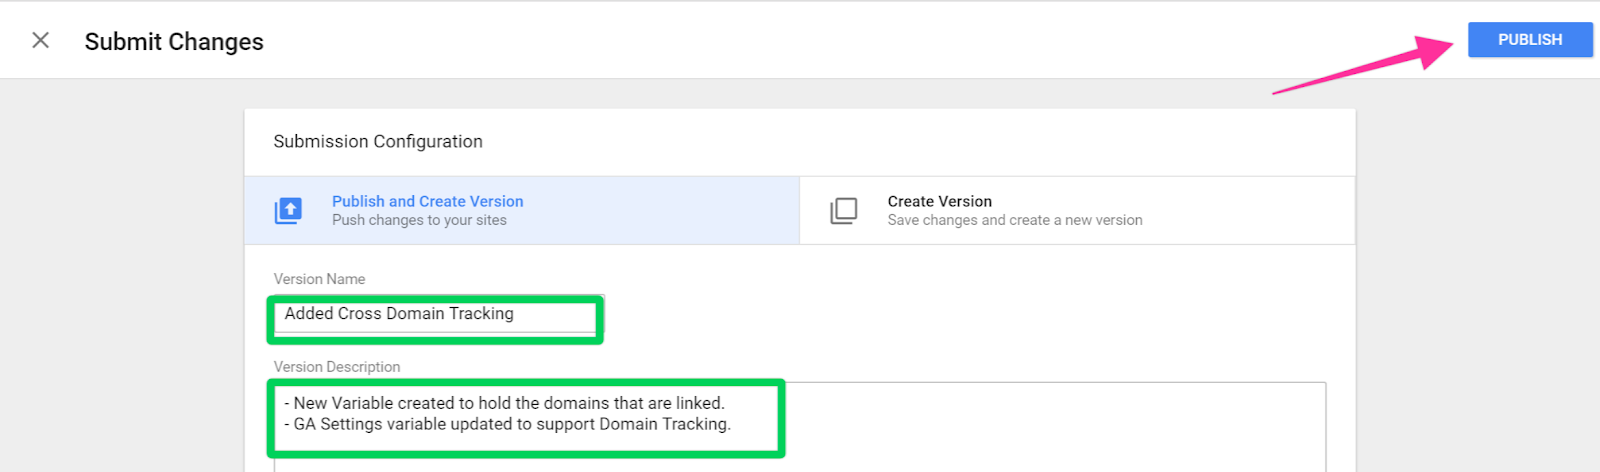
In the “Submission Configuration” panel you will be given the chance to add a name and description to this version. After you have done so, hit “Publish”.
Note: Adding a name and description is optional but recommended. You should enter information here that will make it easy to know what changes are being made.
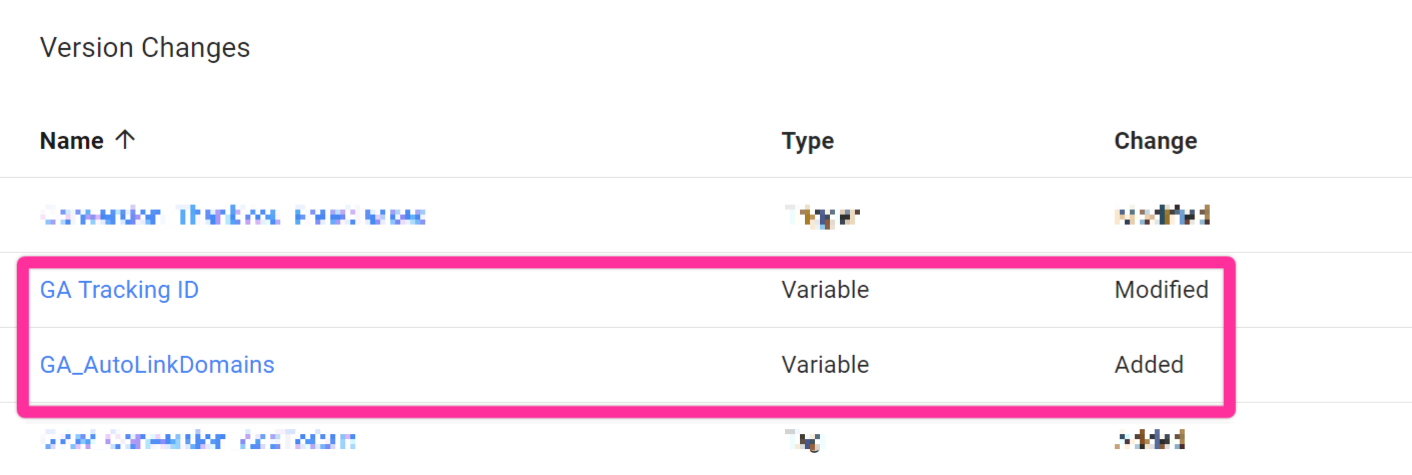
That’s it! You will now be taken to see the summary of the changes you’ve just made:
Adding your new domain to the referral exclusion list:
Open your Google Analytics account settings by clicking here or clicking “Admin” in the sidebar.
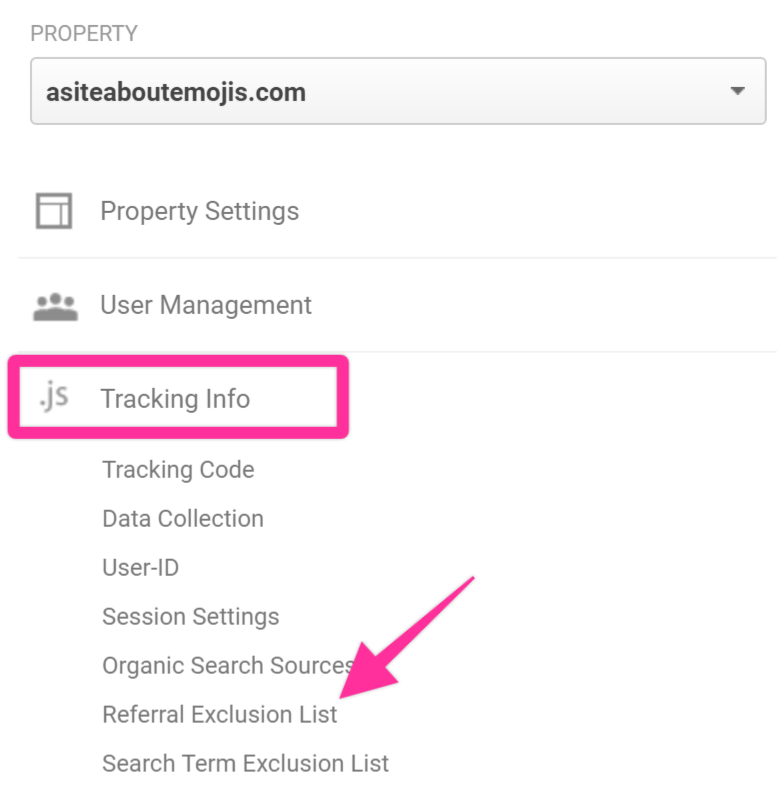
Select the correct Google Analytics Account and Property


Click “Tracking Info” → “Referral Exclusion List”
You should see your root domain on the list:
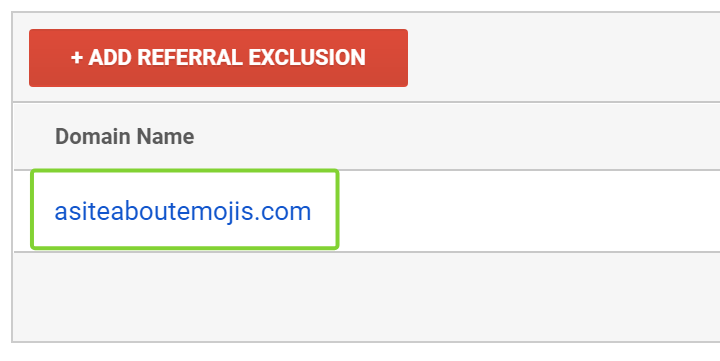
Click “+Add Referral Exclusion”
Type your new domain:
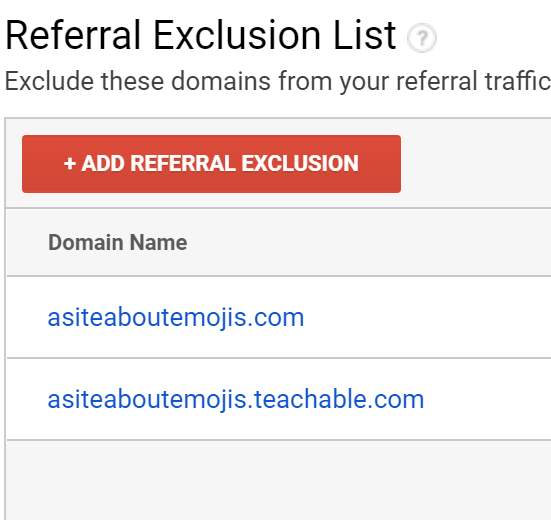
Click “Create”, and that’s it! You should now see your other domain in the Referral Exclusion List:
Checking if cross-domain tracking is working as intended
Open your website using Chrome and navigate to one of the pages in your first
Click on the Google Tag Assistant Chrome extension and click “Record”:

Refresh your page.
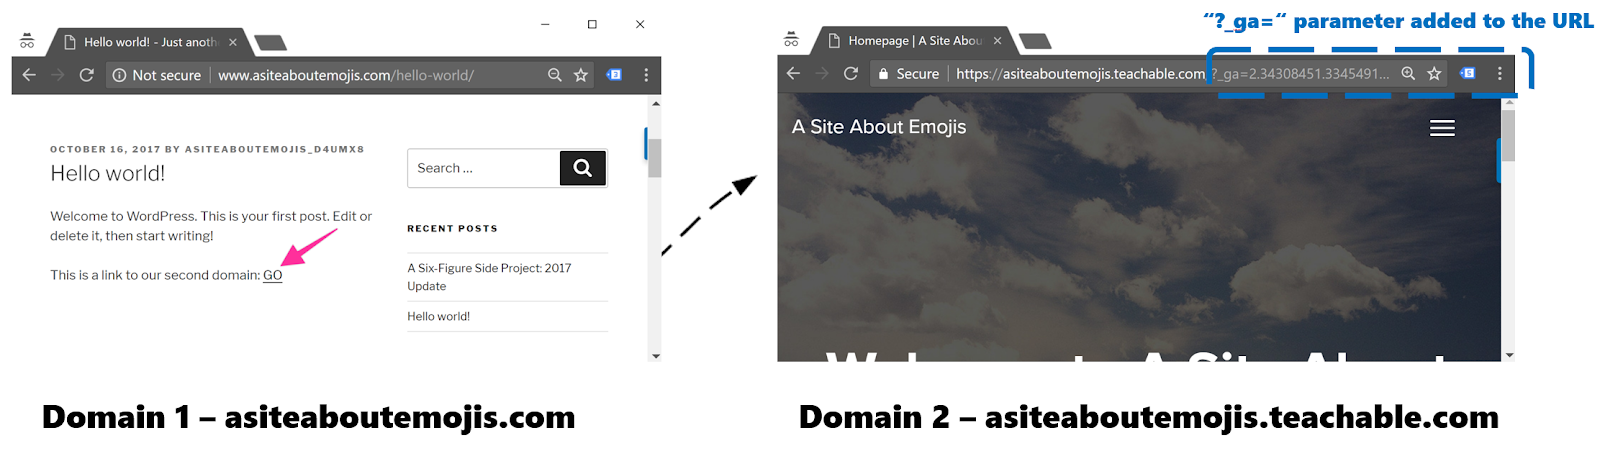
Click any link pointing to your second domain.
Note: Make sure the link you are clicking on opens in the same tab and not a new one, otherwise the Google Tag Assistant recording might not record your whole session.
Note 2: You should see a “_ga” parameter being added to the URL.
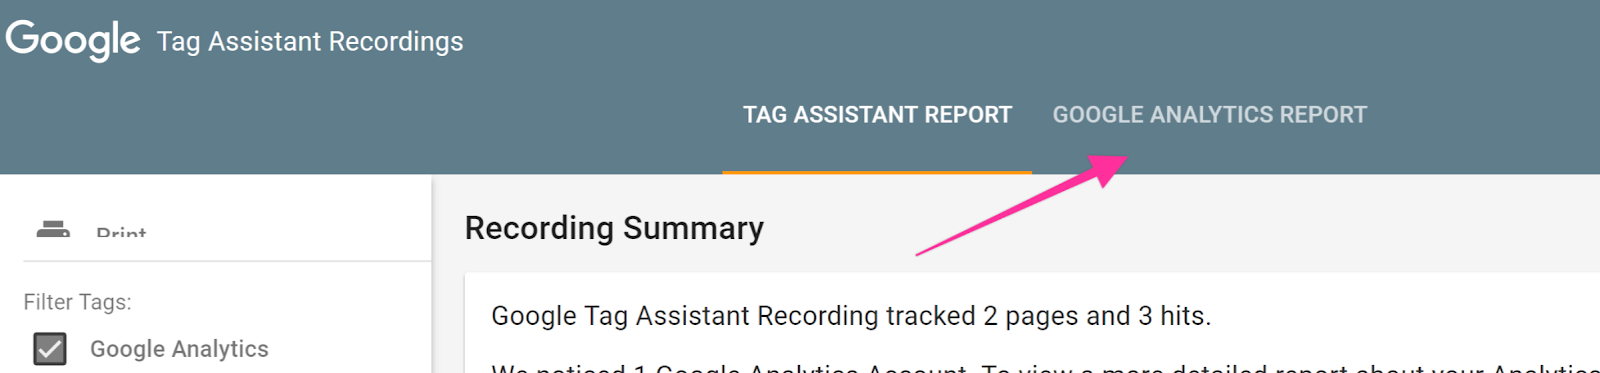
Once the page loads click again on the Google Tag Assistant Chrome extension and click “Stop Recording” and then click “Show Full Report”:
❯
Select “Google Analytics Report”:
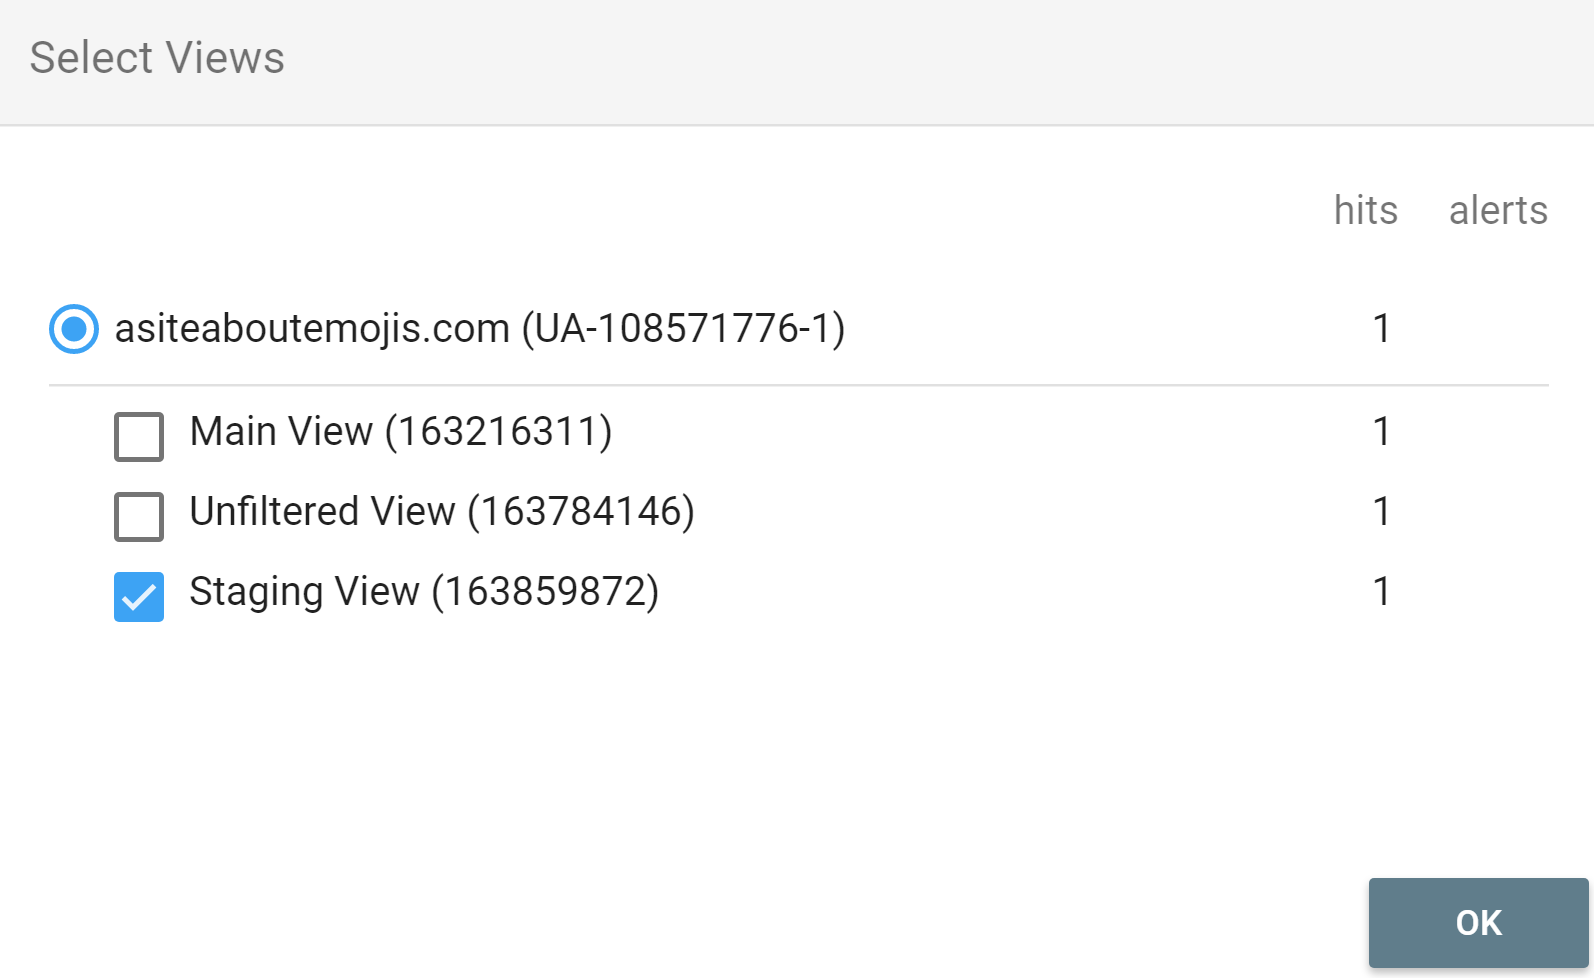
Select the view that you want to test and click “Ok”:
Check the “Alerts” section and make sure you’re not seeing an alert regarding the Cross Domain implementation.
Note: This is how an alert would look like If you had one:

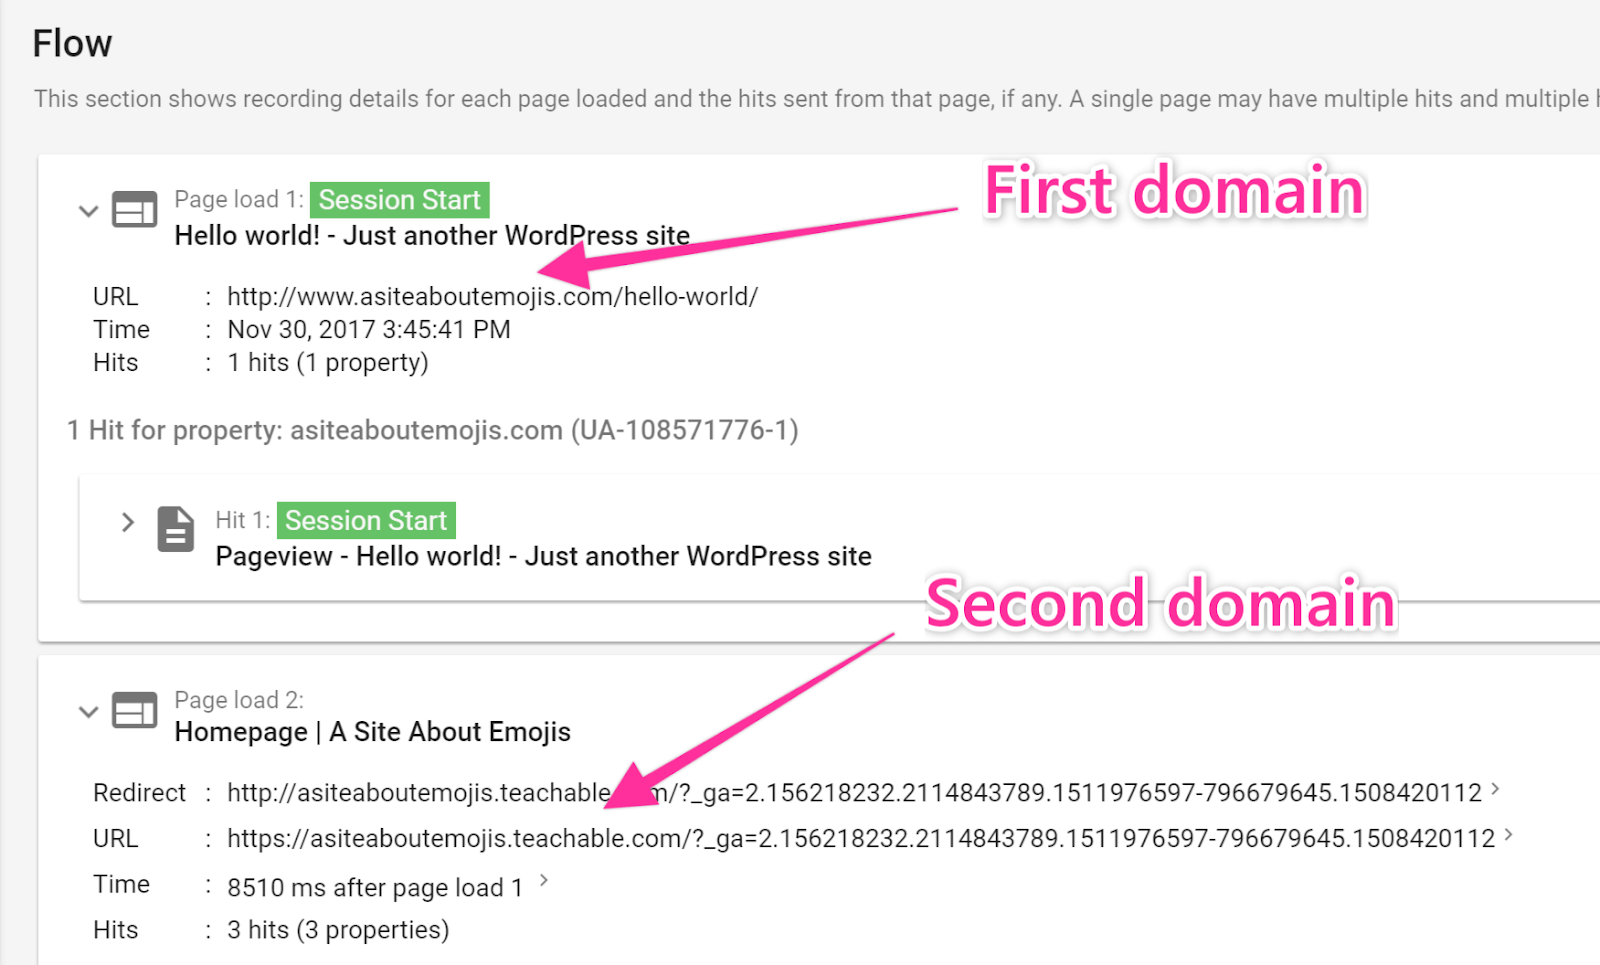
Scroll down in the report until you find the “Flow” section. You should see at least 2 Page loads there:
Click “Page load 1” → The “URL” field should be an URL belonging to your first domain.
Click “Page load 2” → The “URL” field should be an URL belonging to your second domain.
That’s it, if everything looks good your property will start collecting data correctly from both domains.
Adding a Hostname filter to include your subdomain data
Note: This is an optional step and depending on your current Google Analytics setup it might impact other configurations such as custom reports and goals.
Log In to your Google Analytics account.
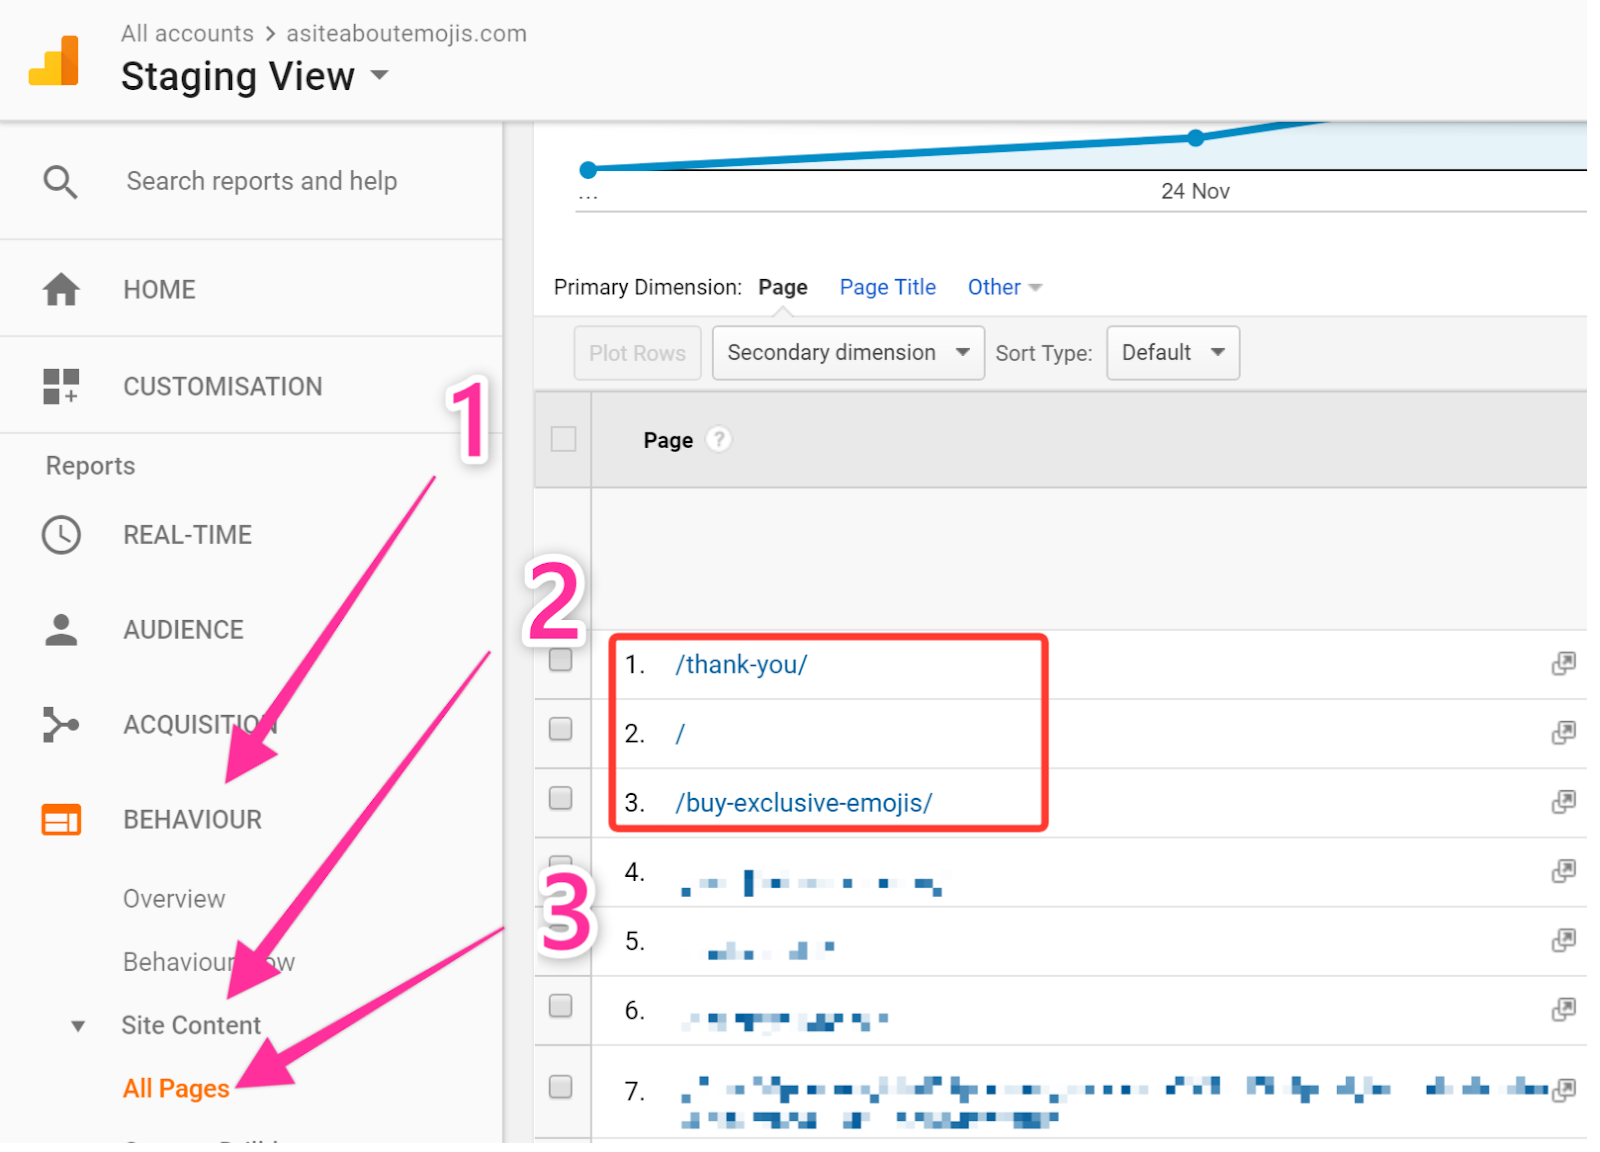
Check If you already have a filter implemented, you can do so under filters, or by heading over to Behaviour → Site Content → All pages.
If you have the standard set up you will see the page path in the reports:
Note: By default Google Analytics will aggregate data from all the domains and subdomains, so you should bear in mind that in fact the page “/” is not only your main domain’s homepage but also the homepage of all your domains and subdomains being tracked by the same property if their homepages are also in the root of the subdomain.