Goal: To set up a hostname filter in Google Analytics that will add your page’s subdomain information to your reports.
Ideal Outcome: You should be able to easily and accurately analyze your traffic reports and immediately distinguish the traffic among your subdomains.
Prerequisites or requirements: You need to have Google Analytics running on your website and all your subdomains.
These specific steps apply only to Universal Google Analytics (not Google Analytics 4).
Why this is important: If your website has multiple subdomains, Google Analytics will aggregate data that has the same page path. Understanding which sessions belong to which subdomains will require you to go through a few extra steps every time you’re analyzing results. This filter adds the subdomain information straight to your reports.
Where this is done: In your Google Analytics account.
When this is done: Only once per view.
Who does this: The person responsible for Analytics.
Google Analytics 4
💡 Note: Google has released a new version of Google Analytics in October 2020, this new version can be set as a property alongside standard version “Universal Analytics”.
The “Universal Analytics” properties will likely be supported by Google for years to come.
To make sure you can follow these step-by-step instructions make sure you have selected the Universal Analytics property once your Google Analytics account has been created.
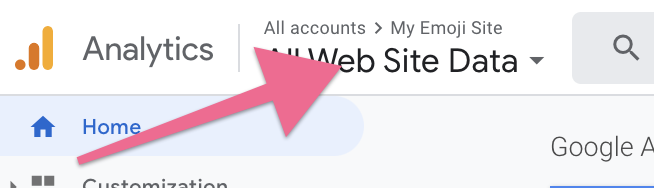
On the top left corner click on the Account Dropdown and select a view within your Universal Analytics property (Not the GA4 property):

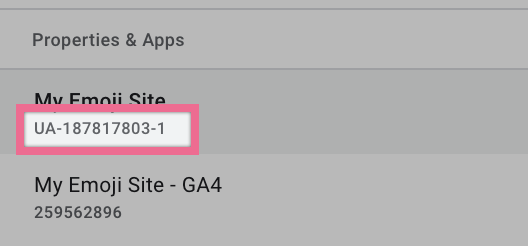
💡 Note: You can identify your Universal Analytics property by noticing the ‘UA-’ prefix in the Property ID below its name:
Adding a Hostname Filter
Go to your Google Analytics Admin panel by clicking here.
If you have multiple Google Analytics accounts make sure you have selected the correct account, property, and view:
Remember: Filters are destructive, they permanently modify the incoming hits. That’s why you should make sure you are not doing these changes in your main and only view. For this task, we are going to be using the “Staging View”.


Note: Make sure you select the Google Analytics - Universal Analytics property (Property ID starts with UA-)
Click on “Filters”:

Click on “Add Filter”:
Name your filter → Select “Filter Type: Custom”
In the first dropdown select “Hostname”, select “Request URL” for the second, and select “Request URL” once again for the last one.
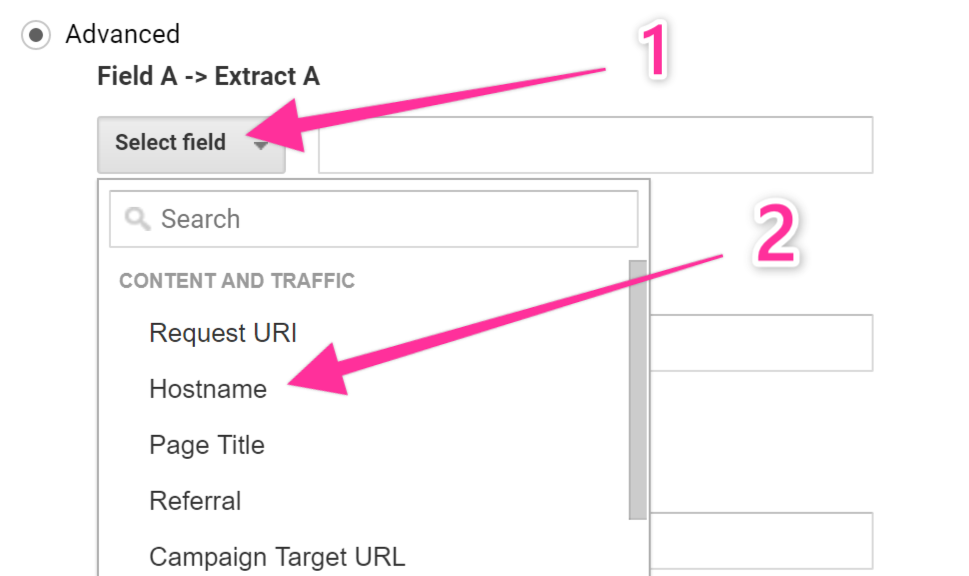
Select “Advanced” and fill in these settings:
Field A -> Extract A: (.*)
Field B -> Extract B: (.*)
Output To -> Constructor: $A1$B1
Your settings should now look like the picture below, if that is the case you’re ready to hit “Save”:

That’s it! You should now be taken to your Filter table and your filter should now be active:
Important: Possible impact of this change in your data
If you already have this Google Analytics property for some time and it already contains important historical data you should be aware that this change might impact:
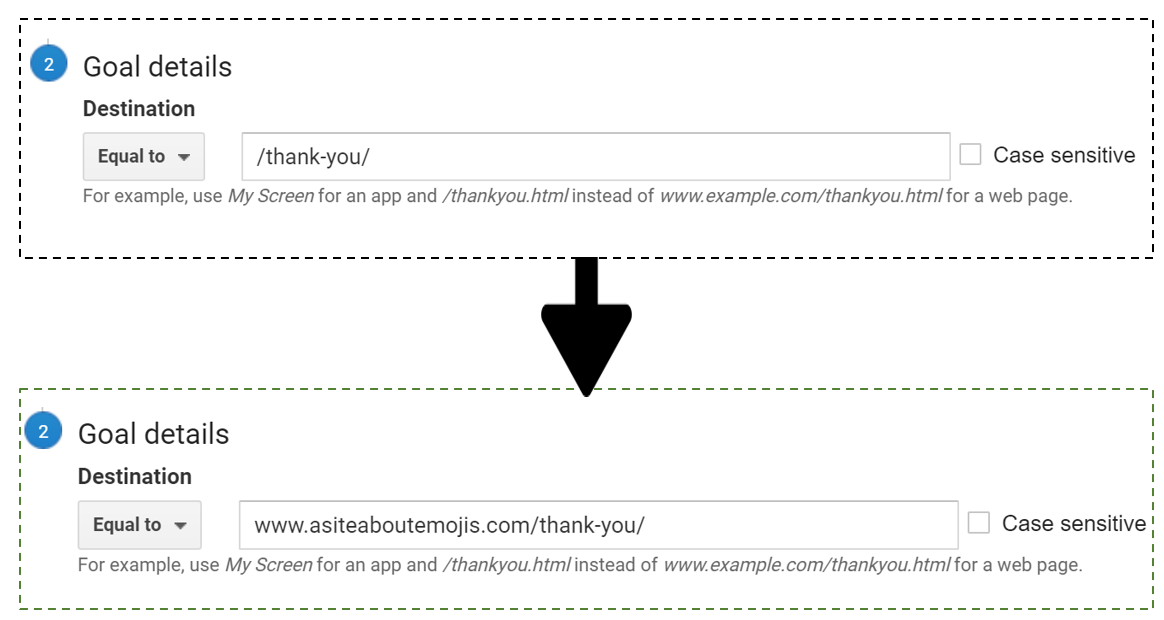
Your “Destination” Goals if they are using the “Equals to” or the “Begins with” match-type.
Note: Some RegEx match-type Goals might be affected by this change as well. If you’re using a RegEx destination goal you might want to ask the person that implemented those goals or a developer beforehand.
Note 2: To update your Goals so that they keep working after this change you should now update the “Destination” field so it now includes your subdomain as well.
Any “Dashboard”, “Custom Report”, or “Custom Alert” where the “Page” dimension is being used as a filter.
Any other customization you might have applied to Google Analytics or any third-party tool that uses the “Page” dimension.
It will be harder to analyze time periods that include the date of this change since Google Analytics will be treating all the pages as different ones from the day of this change onwards.
If that is the case you might prefer to keep your current setup, and apply this setting to an entirely new view, this way your data will not be affected by this change.
Checking If your filter is working as intended
Open your website using Chrome.
Click on the Google Tag Assistant Chrome extension and click “Record”:

Refresh your page.
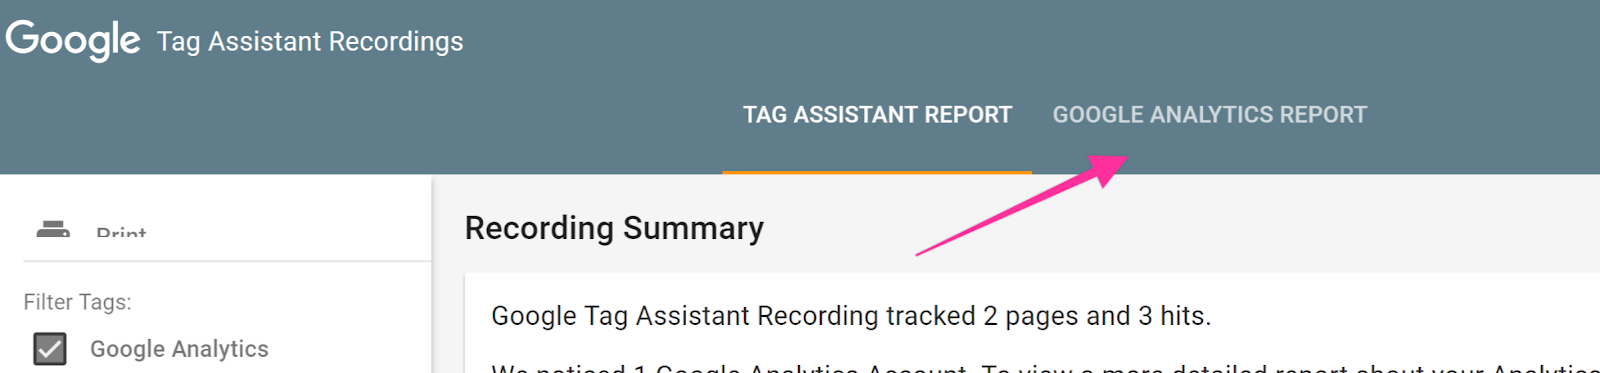
Click again on the Google Tag Assistant Chrome extension and click “Stop Recording” and then click “Show Full Report”:
❯
Select “Google Analytics Report”:
Select the view that you want to test and click “Ok”:
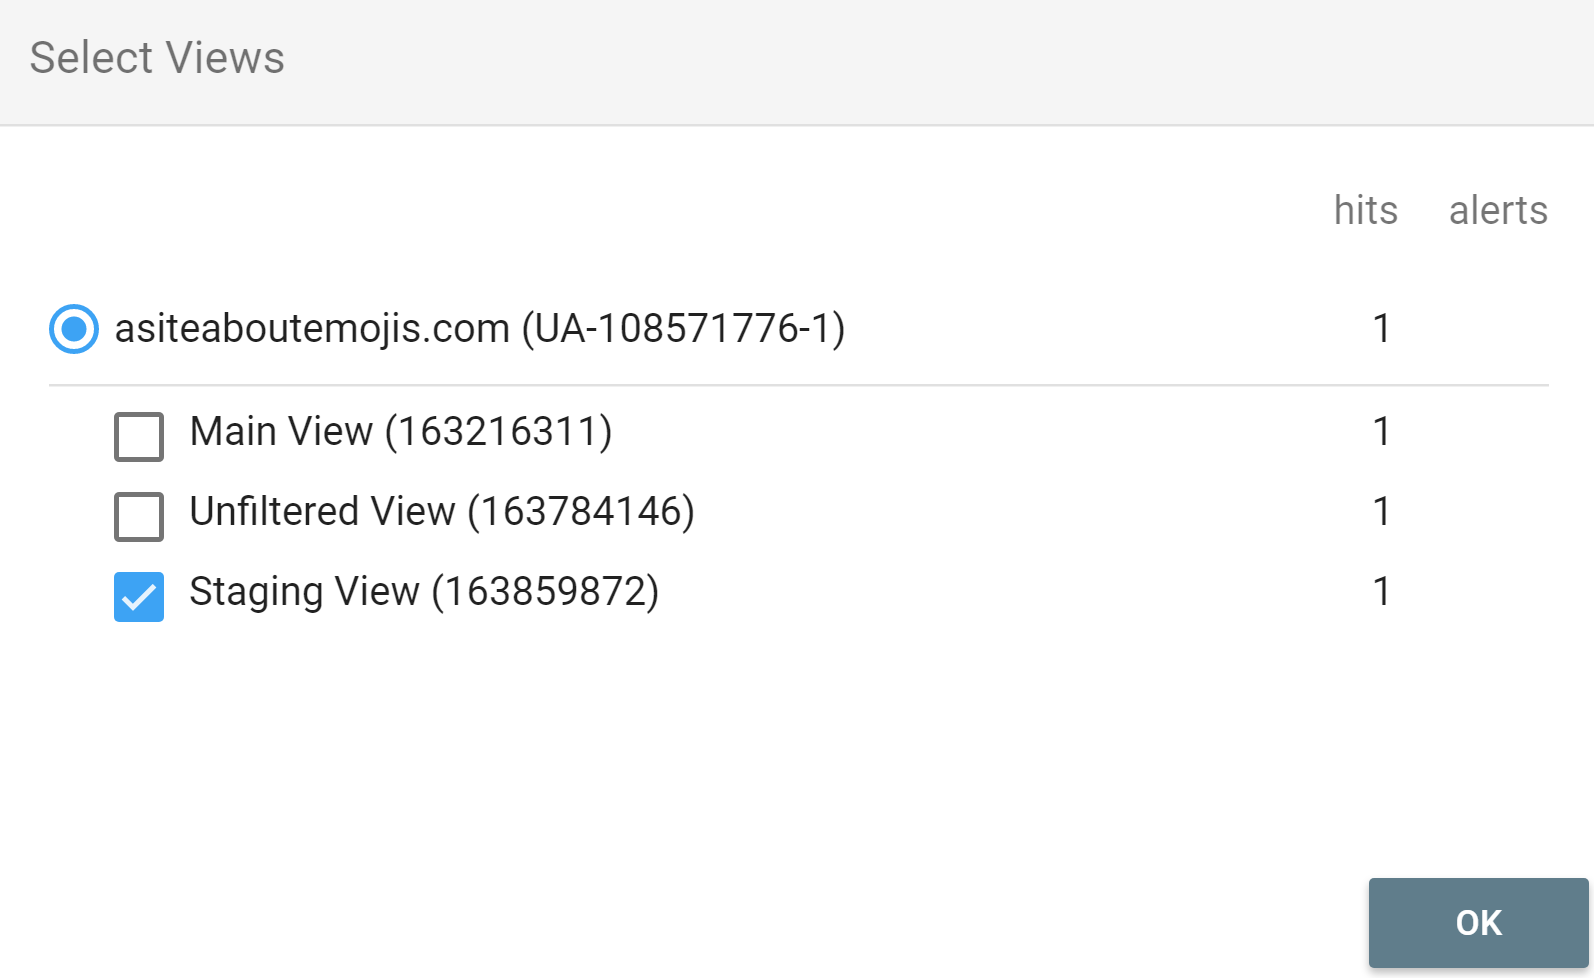
Note: Make sure you select the Google Analytics - Universal Analytics property (Property ID starts with UA-)
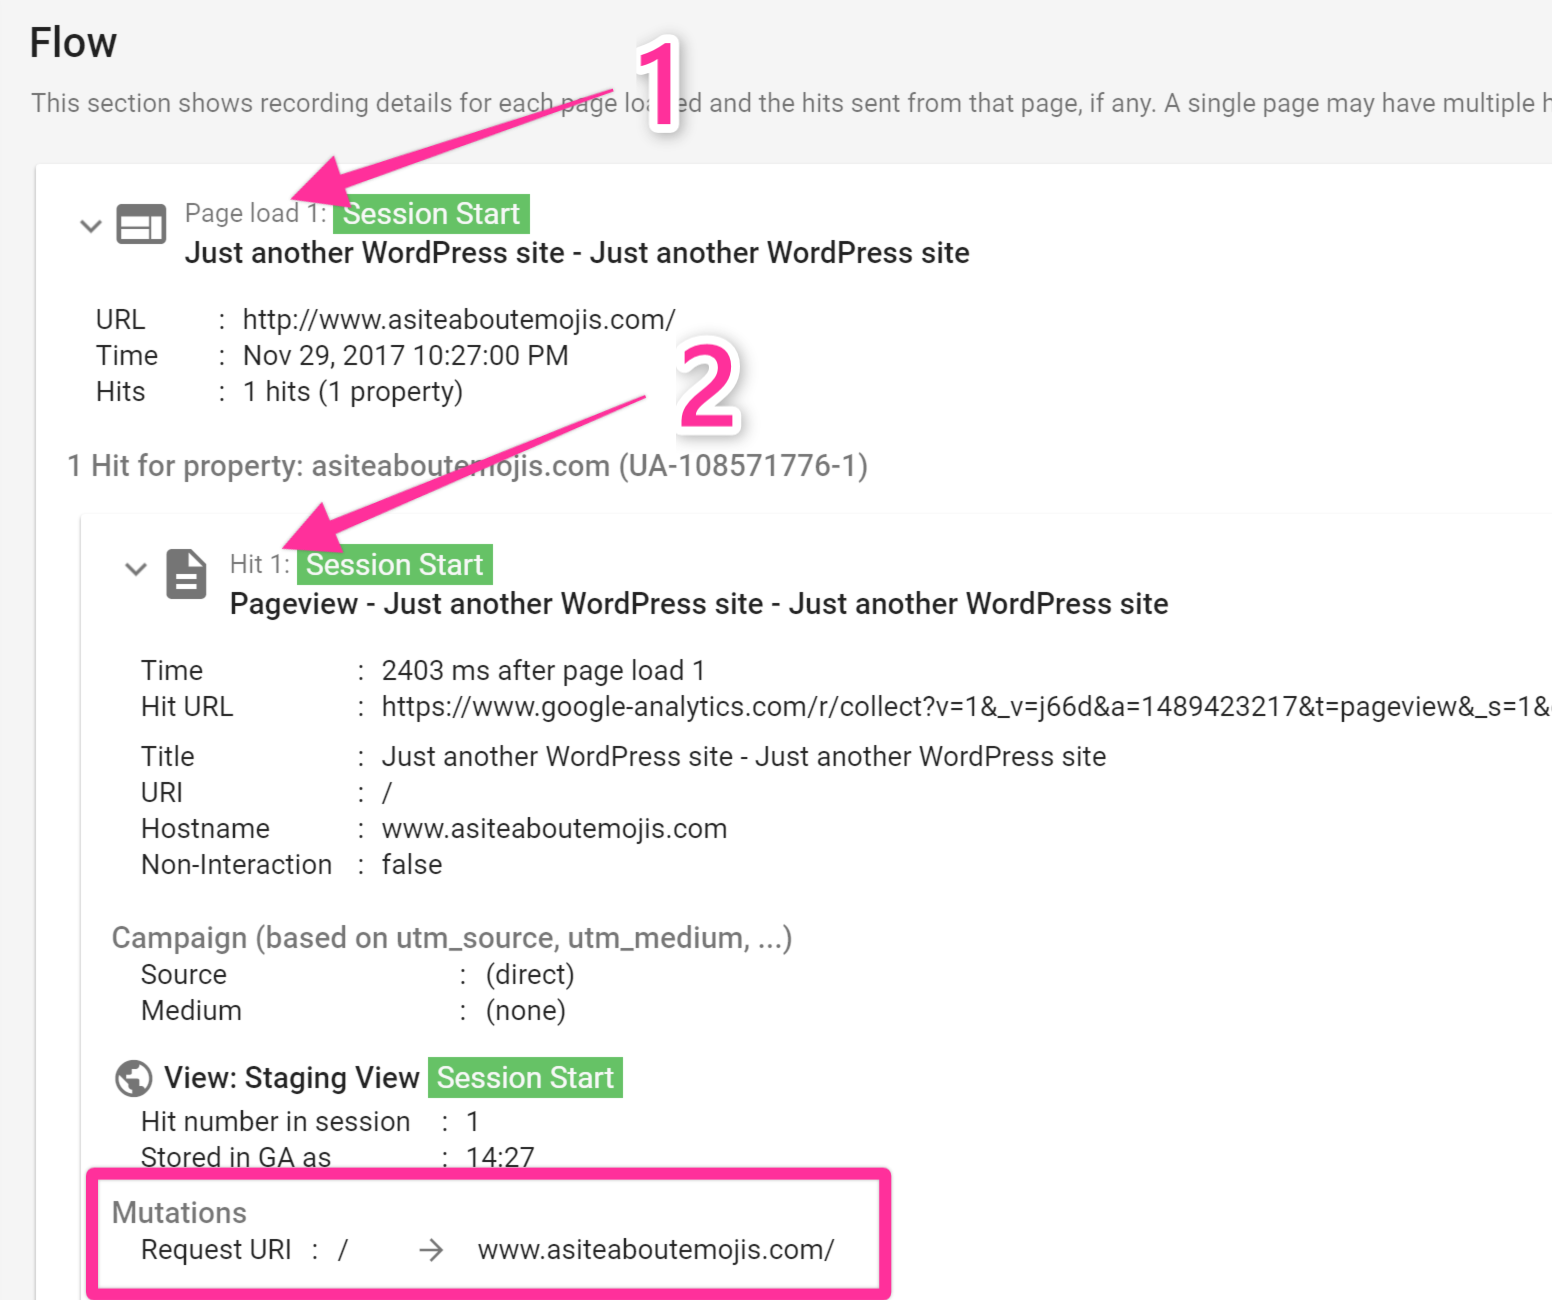
Scroll down in the report until you find the “Flow” section → Click “Page Load 1” → Click “Hit 1”. You should see the “Mutation” subsection displaying the transformation that occurred in your reported hit:
That’s it! If everything looks ok you should start seeing the new data in your reports in the next 24h.