Goal: Have Sumo installed on your website using Google Tag Manager
Ideal Outcome: Get the Sumo plugin properly and use it to grow your site.
Prerequisites or Requirements: Google Tag Manager must be installed on your website.
Why this is important: Sumo offers a set of tools that help you grow your website and receive loads of traffic. We recommend using Google Tag Manager to install Sumo on your site because it enables you to centralize all of the code you add to your site in a single tool.
Where this is done: Your website & Sumo.
When this is done: Yesterday. But it’s okay, you can do it now as well. You only need to install this plugin once and then you’ll be able to enjoy all its benefits.
Who does this: You do it!
Environment setup
Make sure you have the Google Tag Manager set up on your site and that you have access to it.
Get a free Sumo account
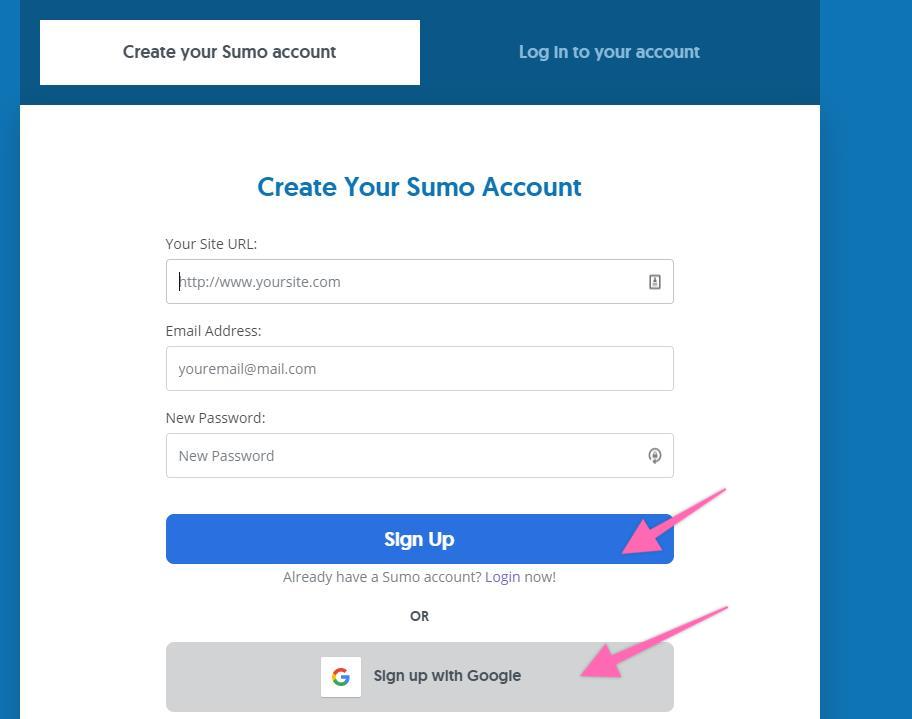
The first thing you need to do to install Sumo is to sign up for a free account.
Click here to go to Sumo and register for an account
Enter your website’s URL, as well as your email address, and choose a password.
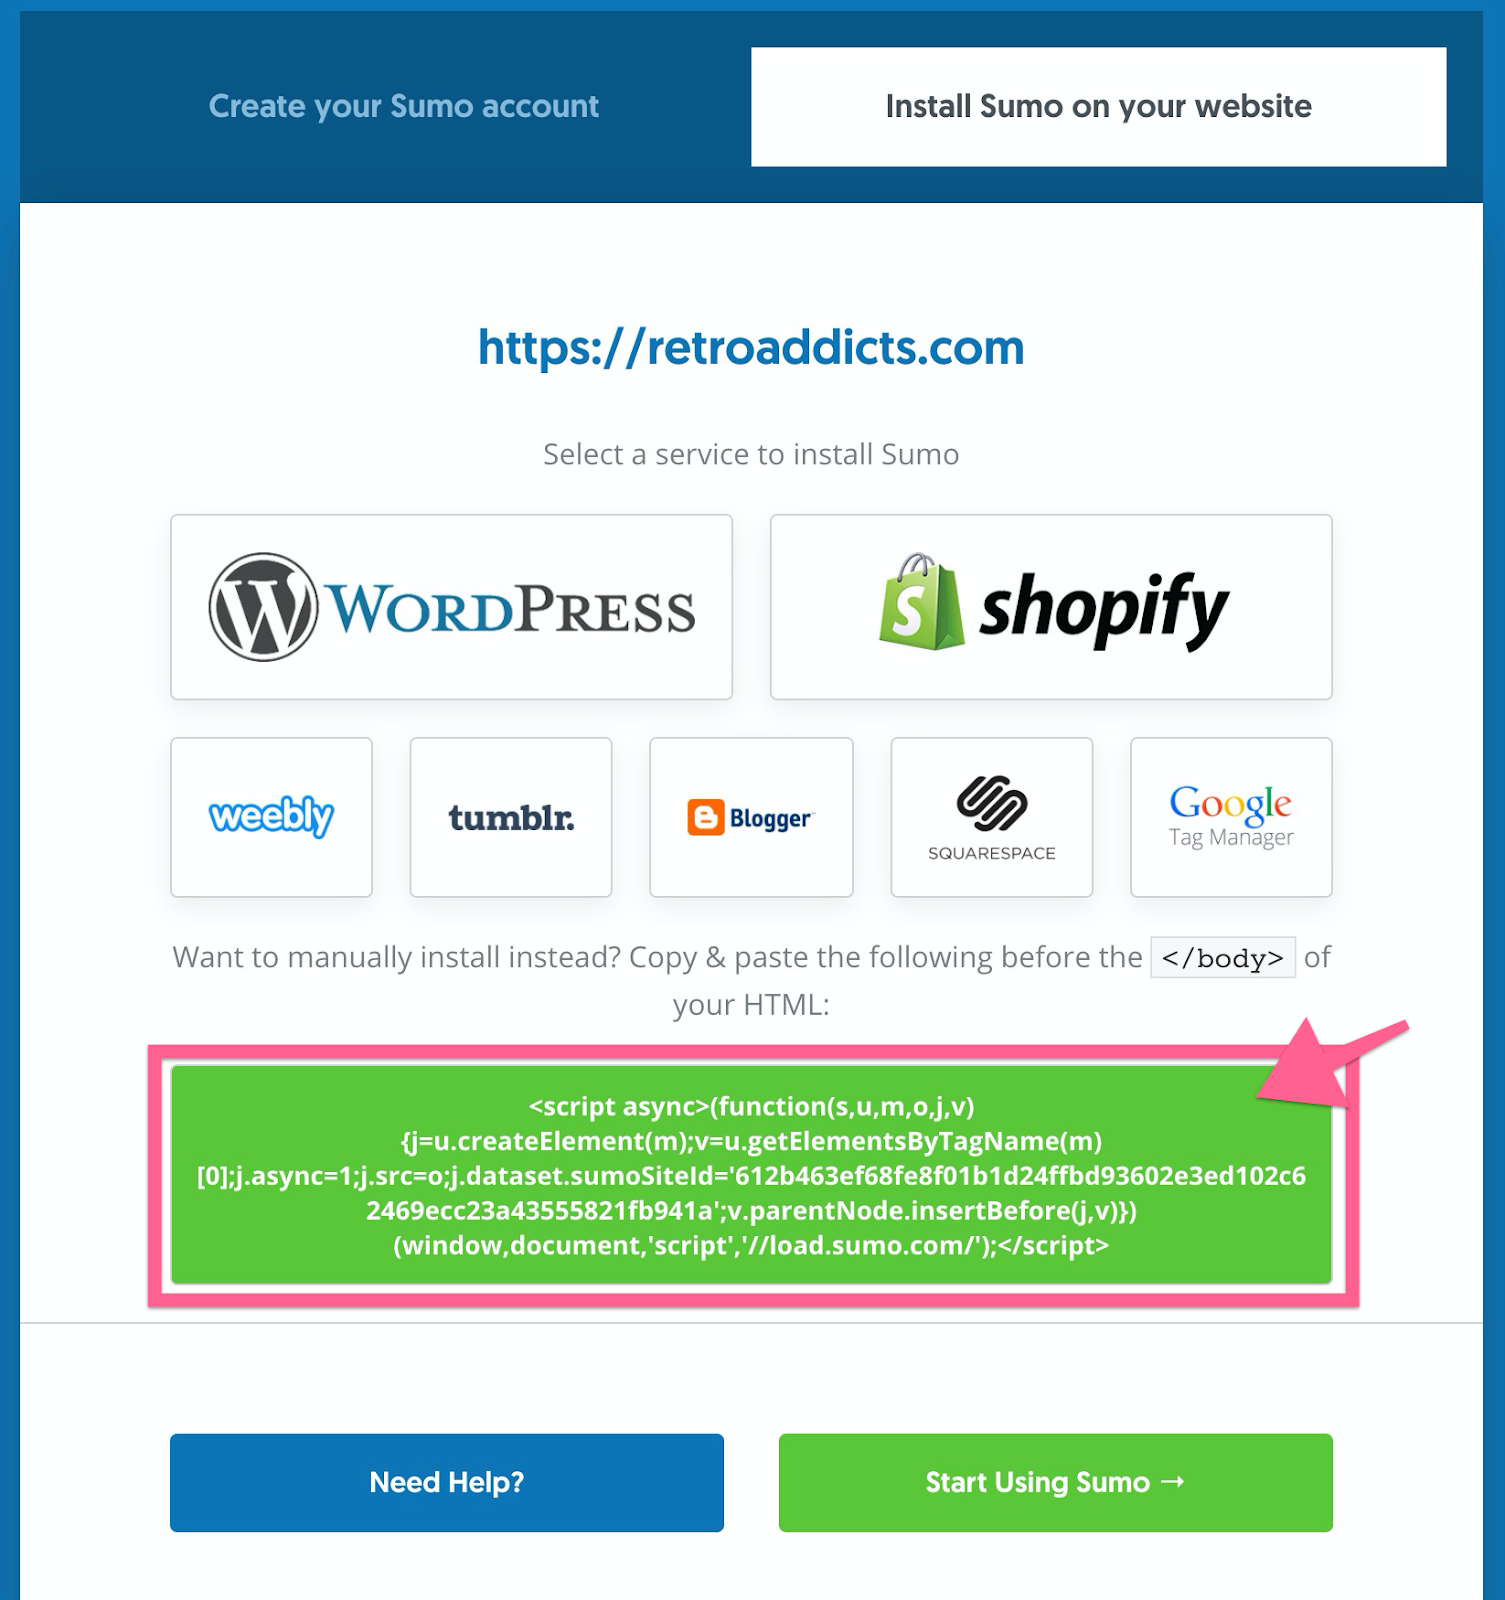
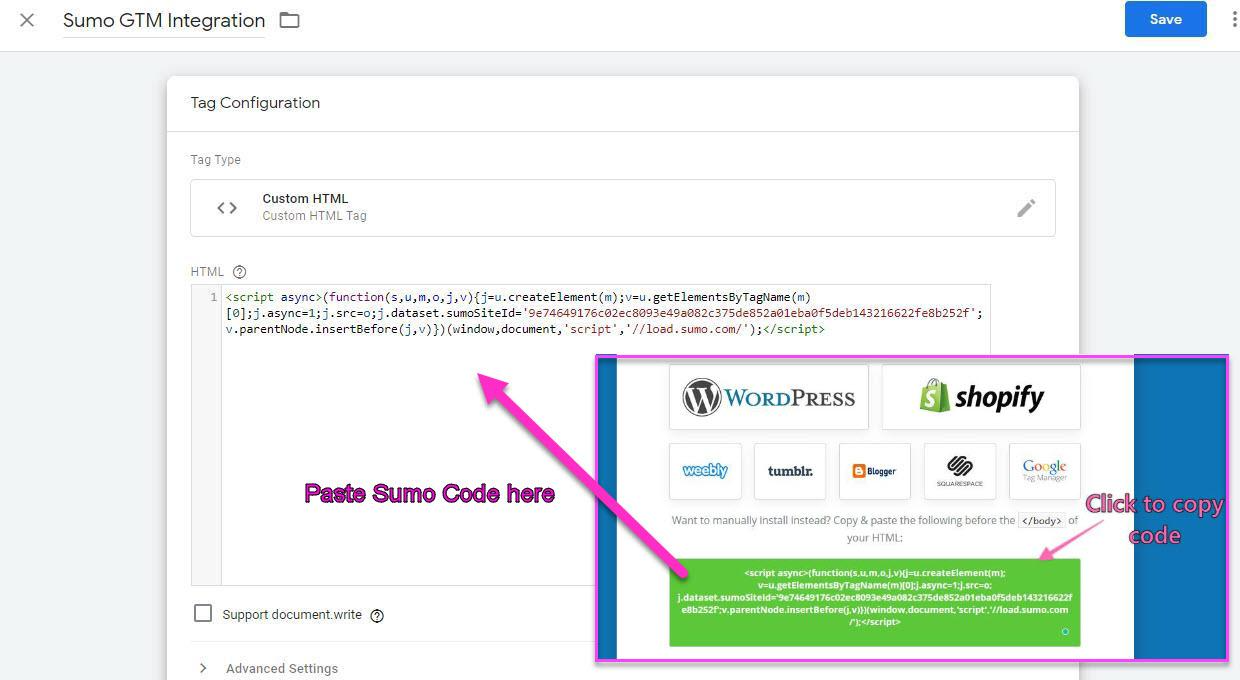
You will be redirected to the screen below. Take note of that script, as we will manually install it in Google Tag Manager later.
Manually Install Sumo in Google Tag Manager
Note: The direct integration between Sumo and GTM doesn't currently work, so the following steps will show you how to install Sumo manually.
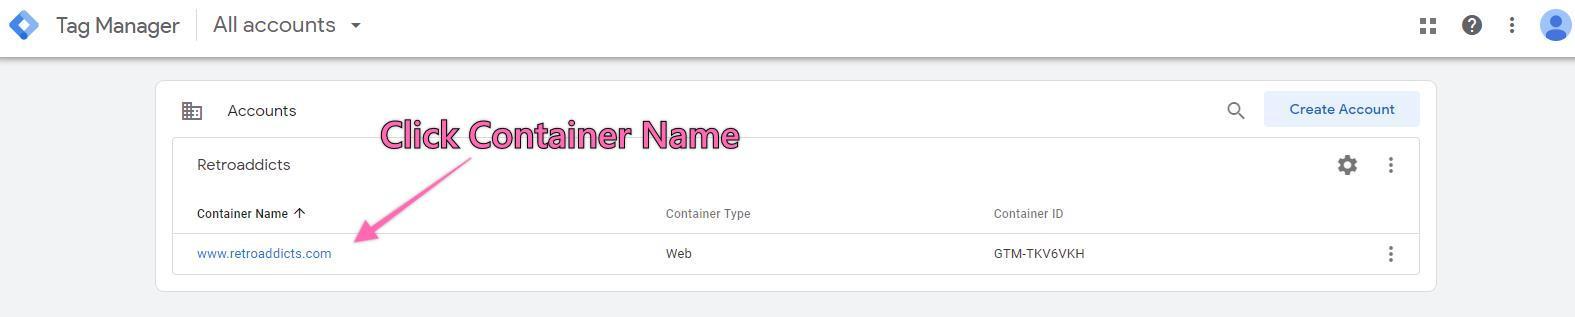
Open tagmanager.google.com in a new tab and choose the ‘Container Name’ of the site where you want to install it:
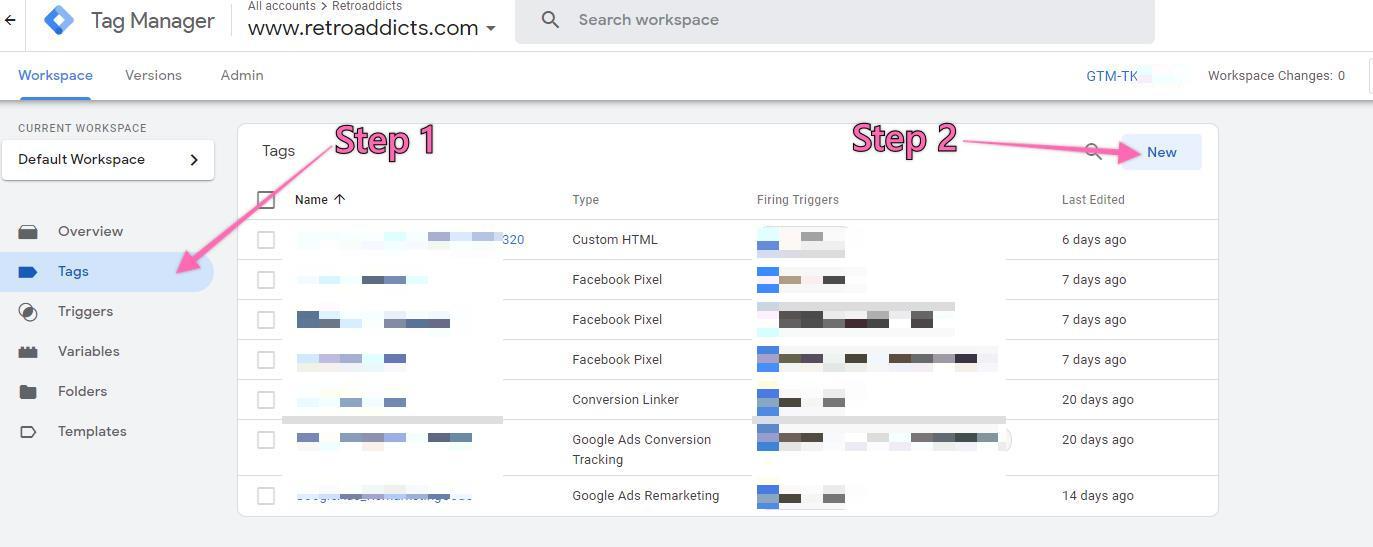
In the left sidebar, click ‘Tags’ then ‘New’:
Rename the tag to something like “Sumo GTM integration” in Google.
Note: When creating new tags, it is recommended to define a naming convention from the beginning, this keeps your Google Tag Manager set up neatly organized and easy to maintain for many years to come.
[Abbreviated Name Of Tool]_[Use for this tag] is a good start.
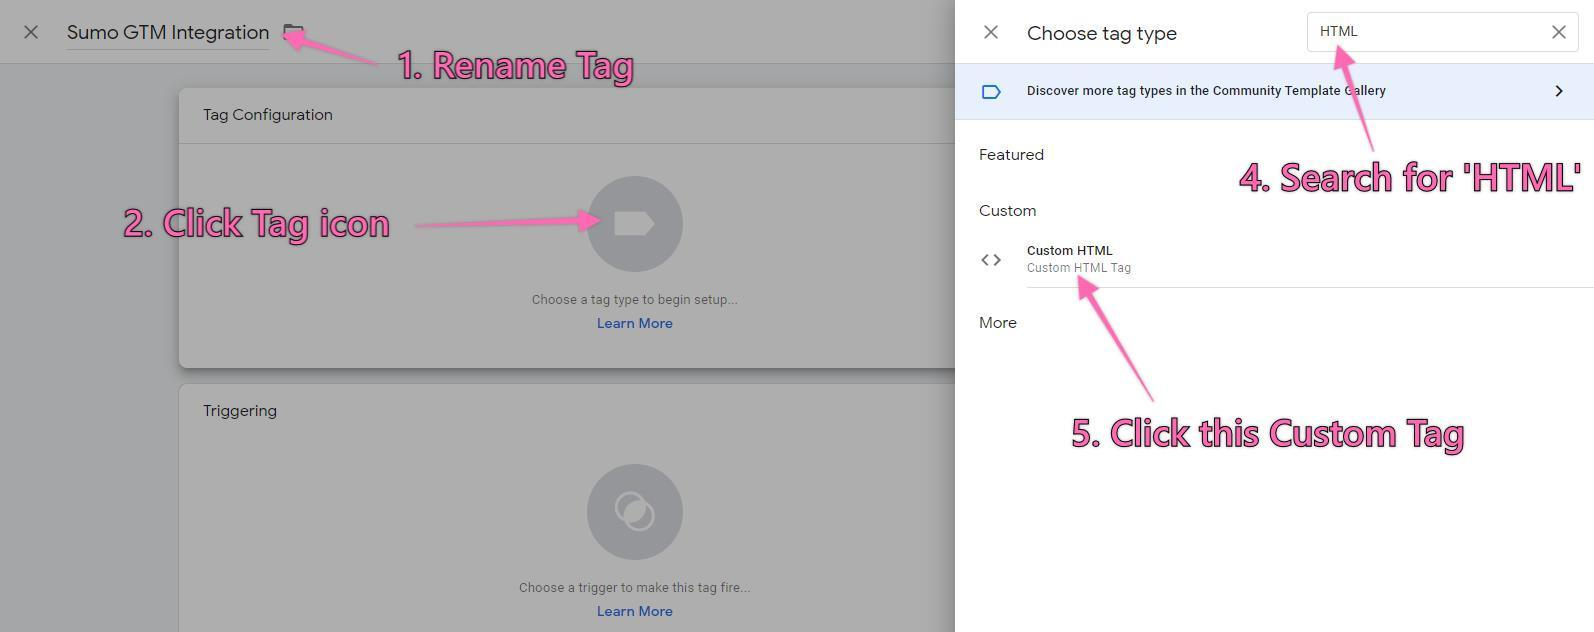
Click on the tag icon above ‘Choose a tag type to begin setup’ and then in the search icon beside ‘Choose tag type,’ type in ‘HTML.’ Click the ‘Custom HTML’ tag type.
Copy the Sumo script from the Sumo registration tab in the ‘Custom HTML’ field in GTM:
Still in the tag configuration panel, scroll down and click the icon under ‘Triggering’ and choose ‘All Pages’, and finally, hit ‘Save.’
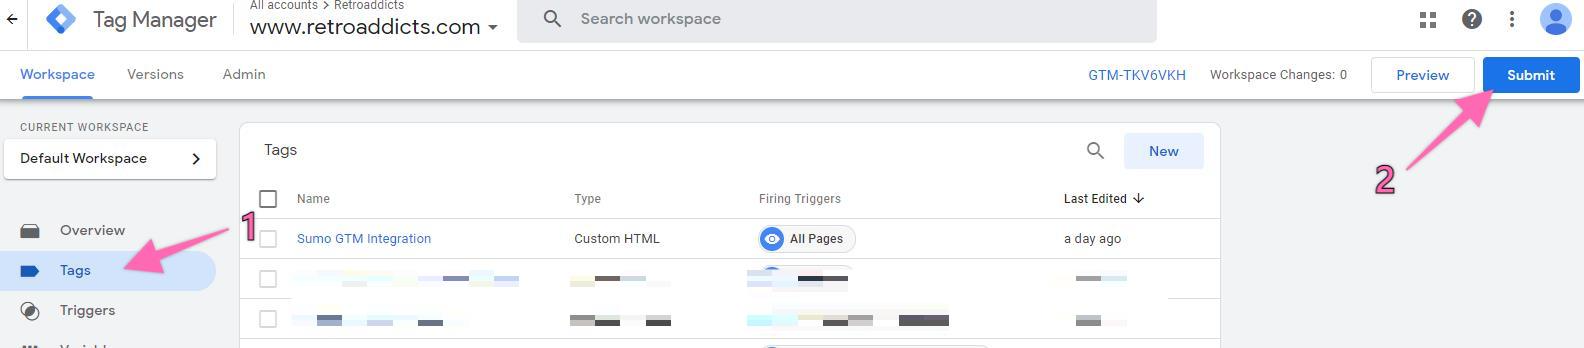
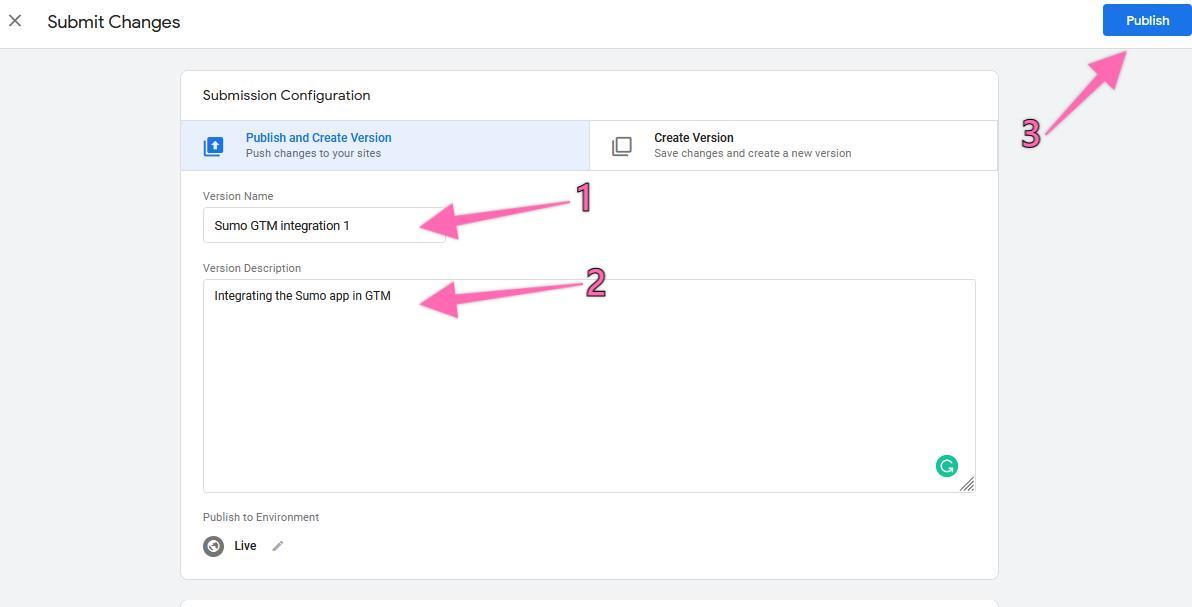
Click ‘Tags’ in the left sidebar and you will see the most recent tag you have configured. Click ‘Submit.’
You will be required to enter a Version Name and Description. Then, hit ‘Submit.’
Note: Adding a name and description is optional but recommended. You should enter the information here that will make it easy to know what changes are being made.
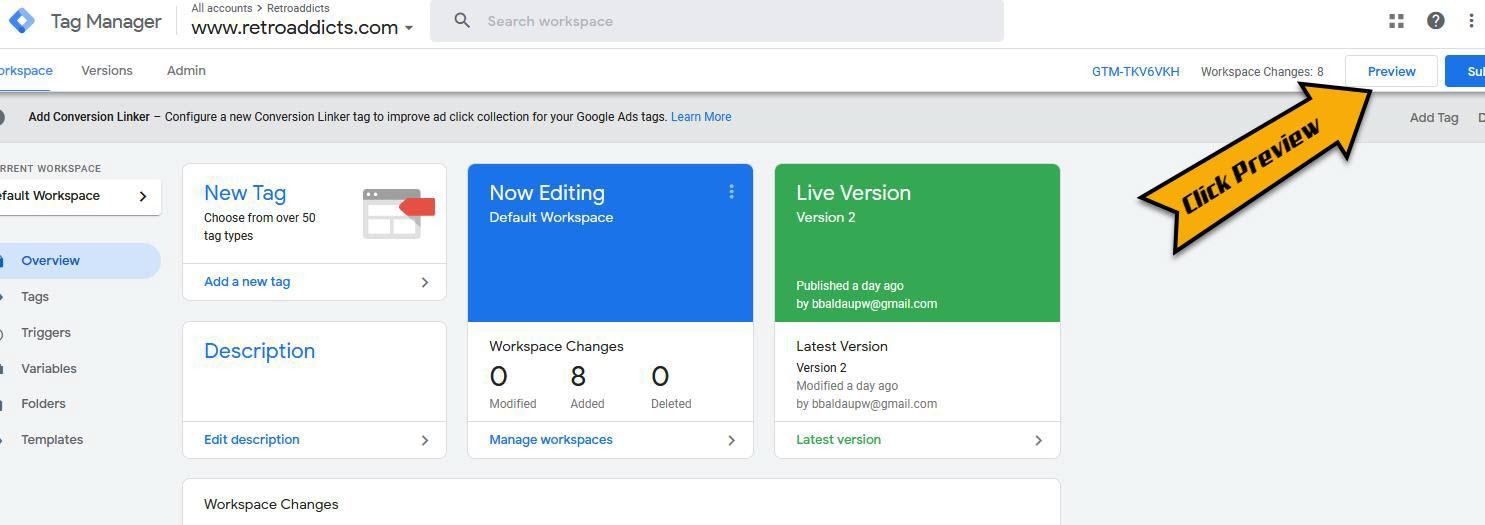
To test if the Sumo tag is working properly, click ‘Preview.’
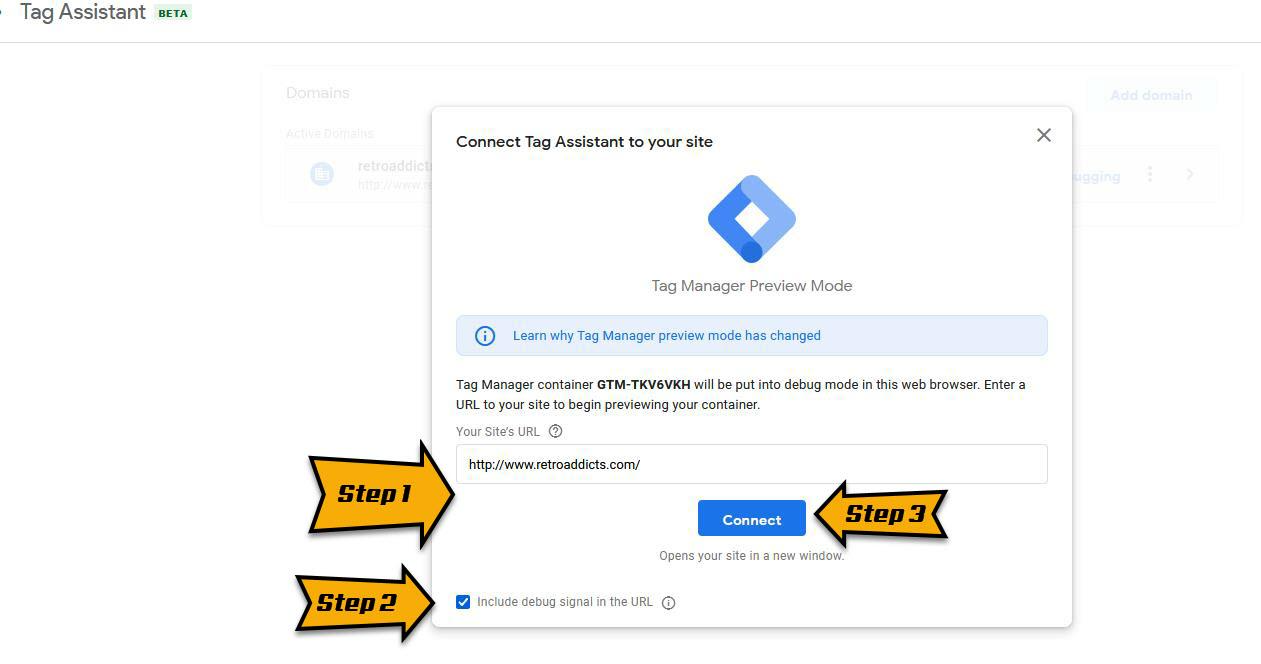
Enter the URL of your website → Click ‘Connect.’
This will open your website’s URL on a new tab. You should be able to see a message on the bottom right corner letting you know that the debugger has connected successfully:

Google Tag Assistant (https://tagassistant.google.com/) will list all your actions. Here, Google Tag Manager will display the tags that were fired on this page — the one you just configure should be within that list.
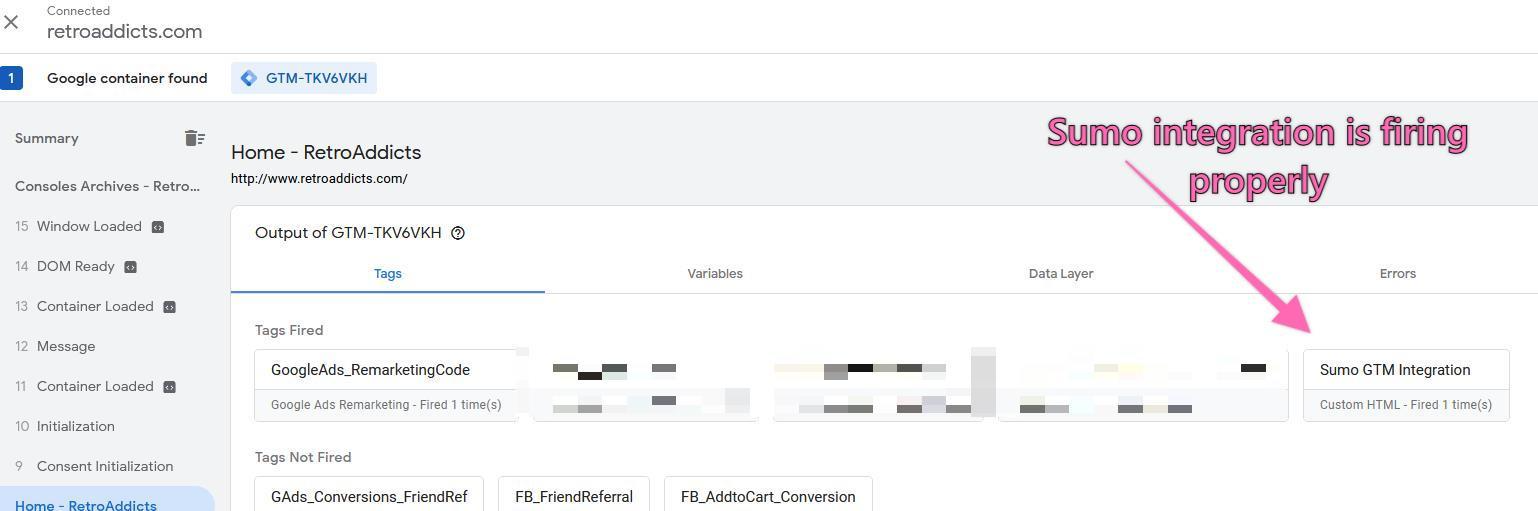
Navigate to other pages on your site and repeat the check on the previous step to make sure that the tag is firing on all pages.
Log in to Sumo using the badge on your website
Now that you have installed Sumo on your website, it will be very easy to access it.
Visit your website and go to your homepage.
The Sumo badge should be located at the top right side of the page, as shown below.

If you can’t see it, disable your ad blockers and refresh the page.
Click on the badge to view your Sumo account details.
That’s it! Now, you have Sumo on your website and a bunch of very useful tools you can use to automate the growth of your site.